
Oracle GoldenGate (OGG) continues to evolve as the gold standard for real-time data replication and streaming. With its refreshed architecture, modern security, and automation features, it’s now easier than ever to deploy across on-premises, OCI, or hybrid environments.
In this post, I’ll show you how to install Oracle GoldenGate 23ai using silent and secure modes. These two options are essential for any DBA or architect who wants consistency, speed, and security from the very beginning.
Silent mode lets you perform a fully unattended installation, ideal for environments without a graphical interface or when you want a repeatable, scriptable setup. Secure mode, on the other hand, strengthens the deployment by enforcing encrypted communication and protecting credentials in an internal wallet.
By the end of this post, you’ll have a repeatable, production-ready GoldenGate installation that combines automation with security, all without a single GUI click.
- Preparing the environment
- Securing Oracle GoldenGate with certificates
- Creating a Silent GoldenGate Deployment with OGGCA
- Conclusion: Automate, Secure, and Simplify
Preparing the environment
For this setup, I’ll use an Oracle Linux 8 VM.
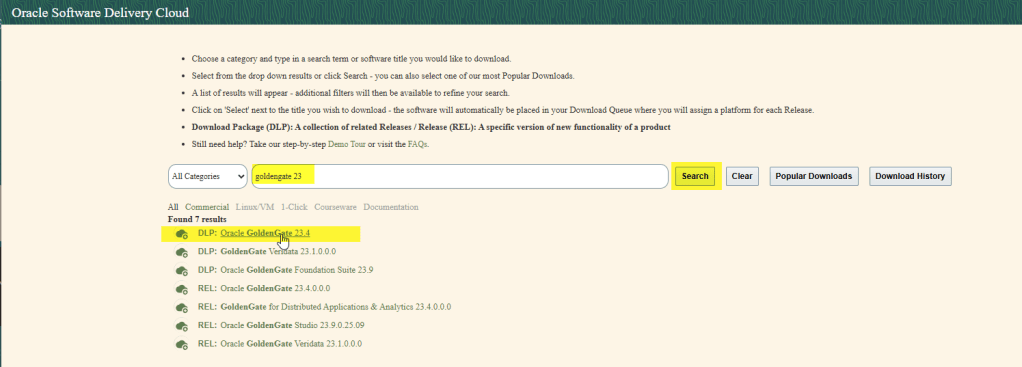
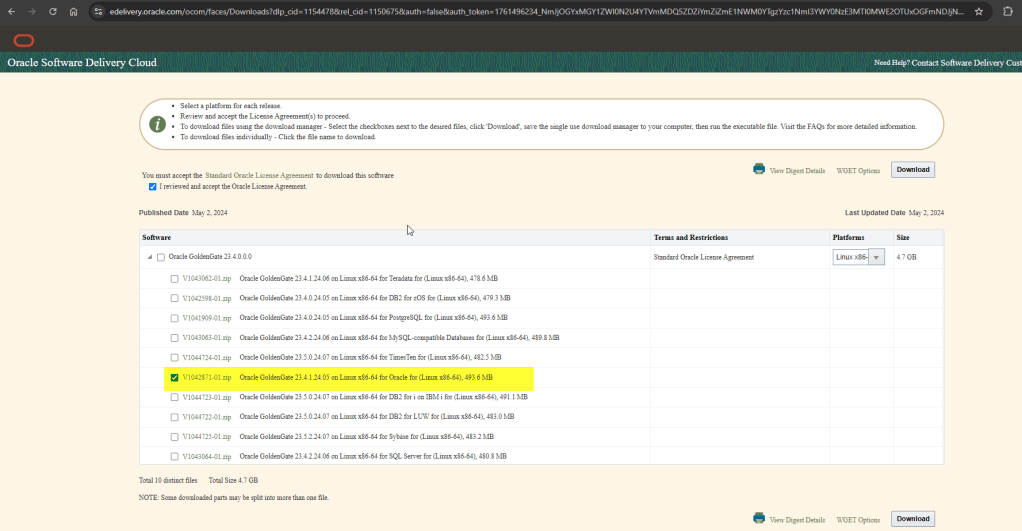
You can download the OGG binaries from Oracle Software Delivery Cloud, you will need to sign in with a valid Oracle account
Just search for GoldenGate 23, download the zip file, and extract it into your software directory.
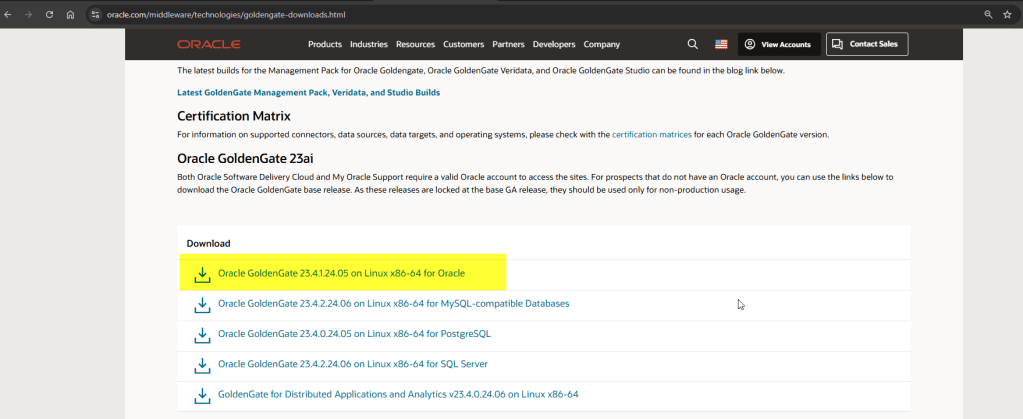
You can also find the binaries from here: Oracle GoldenGate Downloads, although there is a note as follow:
Both Oracle Software Delivery Cloud and My Oracle Support require a valid Oracle account to access the sites. For prospects that do not have an Oracle account, you can use the links below to download the Oracle GoldenGate base release. As these releases are locked at the base GA release, they should be used only for non-production usage.
So, just keep that in mind 😉
So, I have download the zip file inside a directory I have previously created: /u01/app/software

Then unzip the archive and navigate to the directory containing the installer and response files, such as: /u01/app/software/fbo_ggs_Linux_x64_Oracle_services_shiphome/Disk1/response

You should find a sample response file called oggcore.rsp.
This file defines the parameters for your silent installation.

This response file is to install the OGG
Response file looks like this:
####################################################################
## Copyright(c) Oracle Corporation 2020,2022. All rights reserved.##
##                                                                ##
## Specify values for the variables listed below to customize     ##
## your installation.                                             ##
##                                                                ##
## Each variable is associated with a comment. The comment        ##
## can help to populate the variables with the appropriate        ##
## values.                                                        ##
##                                                                ##
## IMPORTANT NOTE: This file should be secured to have read       ##
## permission only by the oracle user or an administrator who     ##
## own this installation to protect any sensitive input values.   ##
##                                                                ##
####################################################################

#-------------------------------------------------------------------------------
# Do not change the following system generated value.
#-------------------------------------------------------------------------------
oracle.install.responseFileVersion=/oracle/install/rspfmt_ogginstall_response_schema_v23_1_0


################################################################################
##                                                                            ##
## Oracle GoldenGate installation option and details                          ##
##                                                                            ##
################################################################################

#-------------------------------------------------------------------------------
# Specify the installation option.
# Specify ora23ai for installing Oracle GoldenGate for Oracle Database 23ai and lower supported versions
#-------------------------------------------------------------------------------
INSTALL_OPTION=

#-------------------------------------------------------------------------------
# Specify a location to install Oracle GoldenGate
#-------------------------------------------------------------------------------
SOFTWARE_LOCATION=

################################################################################
##                                                                            ##
## Specify details to Create inventory for Oracle installs                    ##
## Required only for the first Oracle product install on a system.            ##
##                                                                            ##
################################################################################

#-------------------------------------------------------------------------------
# Specify the location which holds the install inventory files.
# This is an optional parameter if installing on
# Windows based Operating System.
#-------------------------------------------------------------------------------
INVENTORY_LOCATION=

#-------------------------------------------------------------------------------
# Unix group to be set for the inventory directory.
# This parameter is not applicable if installing on
# Windows based Operating System.
#-------------------------------------------------------------------------------
UNIX_GROUP_NAME=
Make a backup of the original response file and edit it with your preferred values:
cp oggcore.rsp oggcore.rsp_bck
vi oggcore.rsp
I have modified the file and this is what i have:

oracle.install.responseFileVersion=/oracle/install/rspfmt_ogginstall_response_schema_v23_1_0
INSTALL_OPTION=ora23ai
SOFTWARE_LOCATION=/u01/app/ogg23ai
INVENTORY_LOCATION=/u01/app/oraInventory
UNIX_GROUP_NAME=oinstall
Ensure the directory in my case is /u01/app/ogg23ai exists and is owned by the user you are using, again in my case is oracle user:
chown -R oracle:oinstall /u01/app/ogg23ai
Now, launch the silent installation:
cd /u01/app/software/fbo_ggs_Linux_x64_Oracle_services_shiphome/Disk1/

./runInstaller -silent -showProgress -responseFile /u01/app/software/fbo_ggs_Linux_x64_Oracle_services_shiphome/Disk1/response/oggcore.rsp

Once the installation is completed and succesfully you need to run a script as root user:

Installation is completed!
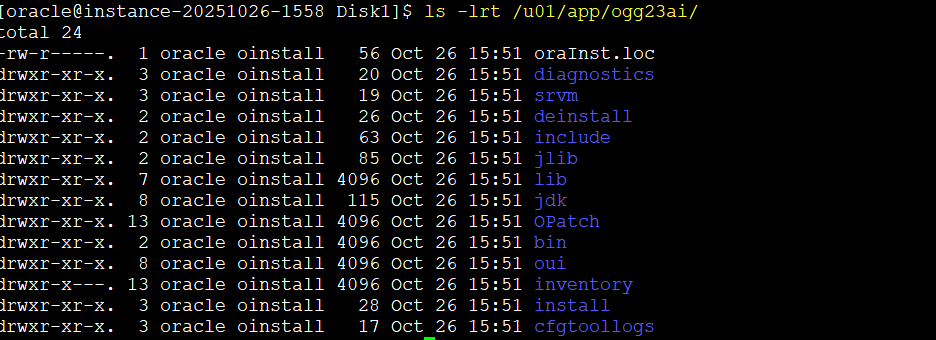
So, we you can see the following
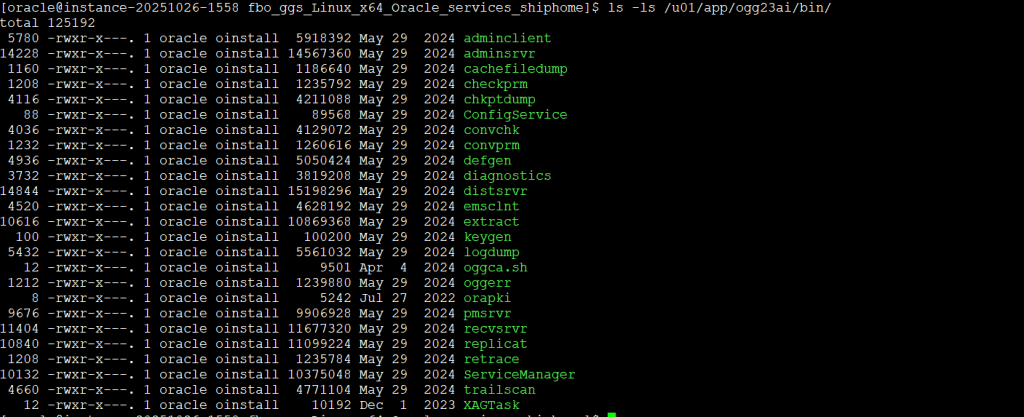
| Name | Description | Default Directory |
|---|---|---|
adminclient | Command line interface for Oracle GoldenGate Microservices Architecture. | $OGG_HOME/bin |
adminsrvr | The Administration Service supervises, administers, manages, and monitors processes operating within an Oracle GoldenGate deployment for both active and inactive processes. | $OGG_HOME/bin |
chkptdump | Utility to dump contents from the checkpoint files. | $OGG_HOME/bin |
distsrvr | A Distribution Service is a service that functions as a networked data distribution agent in support of conveying and processing data and commands in a distributed deployment. | $OGG_HOME/bin |
extract | Extract data process. | $OGG_HOME/bin |
logdump | Utility to open files, control the display, navigate through a file, and search, filter, view, and save data that’s stored in a trail or Extract file. | $OGG_HOME/bin |
oggca.sh | The Oracle GoldenGate Microservices Configuration Assistant. | $OGG_HOME/bin |
oggerr | Retrieves a detailed explanation for an Oracle GoldenGate message. | $OGG_HOME/bin |
orapki | Utility to manage public key infrastructure elements, such as wallets and certificate revocation lists. | $OGG_HOME/bin |
pmsrvr | The Performance Metrics Service uses the metrics service to collect and store instance deployment performance results. | $OGG_HOME/bin |
recvsrvr | A Receiver Service is the central control service that handles all incoming trail files. | $OGG_HOME/bin |
replicat | Replicat data process. | $OGG_HOME/bin |
ServiceManager | A Service Manager acts as a watchdog for other microservices in Oracle GoldenGate. | $OGG_HOME/bin |
trailscan | Utility that scans transaction from trail files. | $OGG_HOME/bin |
sqlplus | An interactive tool with a command-line user interface used to connect to the Oracle Database Server. | $OGG_HOME/lib/instantclient |
sql | An SQL directory that contains the healthcheck, legacy, and sharding utilities. | $OGG_HOME/lib |
utl | A utility directory that contains the install, logging, reverseproxy, and sharding utilities. | $OGG_HOME/lib |
But we are not done yet… We need to create our first OGG deployment!
Before creating this OGG deployment we need to setup the security part
Securing Oracle GoldenGate with certificates
Oracle GoldenGate deployment can be secured in two ways:
- Secure an Oracle GoldeGate deployment with Server Certtificates. To set up server, client, and trusted root certificates from the Oracle GoldenGate web interface, see Manage Certificates for Deployments. To use REST API service endpoints for setting up certificates for a deployment, see Certificates REST Endpoints in the REST API documentation.
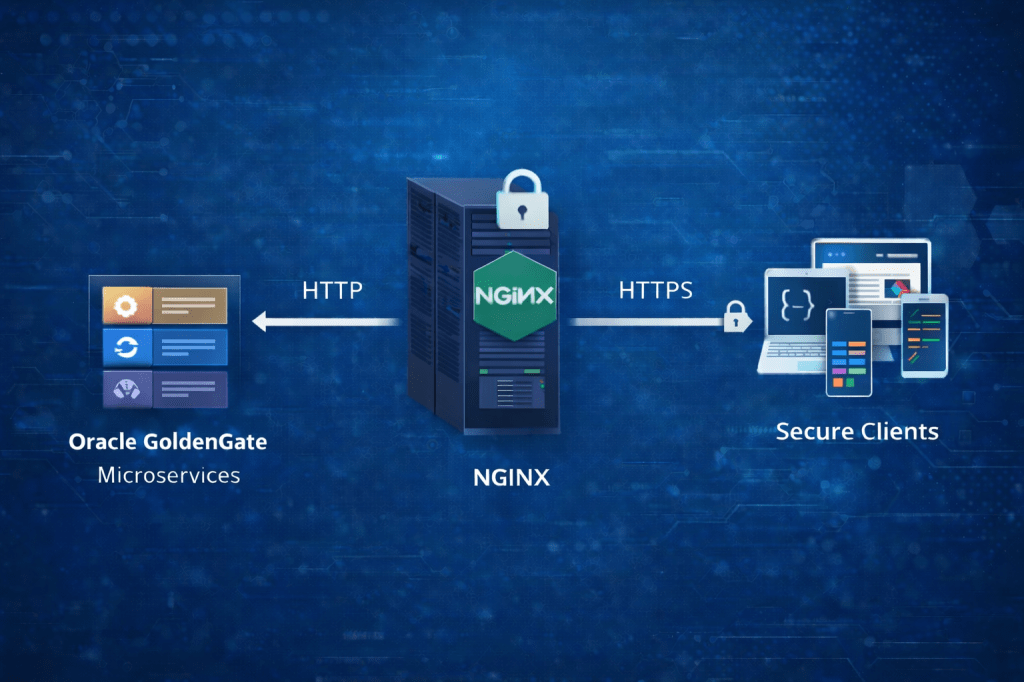
- Set up an Oracle GoldenGate deployment without a Server Certificate, but using a reverse proxy. TLS is terminated at the proxy. The server must be locked-down. To configure reverse proxy using Nginx, see Configure Oracle GoldenGate Reverse Proxy with NGINX.
Note: This example uses self-signed certificates for demonstration purposes.
In production, always use certificates issued by a trusted Certificate Authority (CA) or your organization’s PKI.
The most common use case when generating certificates within the same organization is to create a single trusted Root CA, which can then be reused across multiple environments within the same organization.
So, let’s do that but one more thing: the provided OpenSSL commands are using a self-signed certificate.
This example demonstrates how to configure a secure environment using self-signed certificates. In production, you should rely on certificates issued by a trusted Certificate Authority (CA) or your enterprise PKI.
I will store the certificates in the following folder: /u01/app/ogg23ai/certs so let’s create it:
mkdir -p /u01/app/ogg23ai/certs
Create a Self-Signed Root Certificate
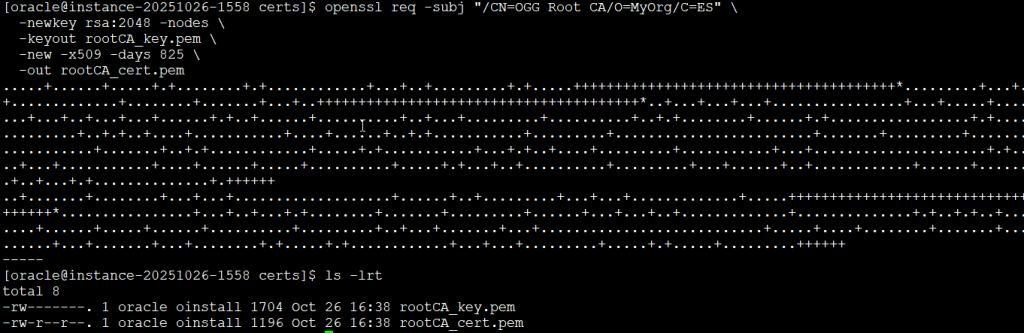
You can generate a trusted RootCA certificate as follow:
openssl req -subj "/CN=RootCA"     \
            -newkey rsa:2048       \
            -nodes                 \
            -keyout rootCA_key.pem \
            -new -x509 -days 365   \
            -out rootCA_cert.pem
This command creates two files: rootCA_cert.pem for the root certificate and rootCA_key.pem for the private key, both in Privacy Enhanced Mail (PEM) format. The private key uses Public-Key Cryptography Standards (PKCS) #8 format. The root certificate is needed for a secure Oracle GoldenGate deployment, where it can also be used for the distribution client certificate.
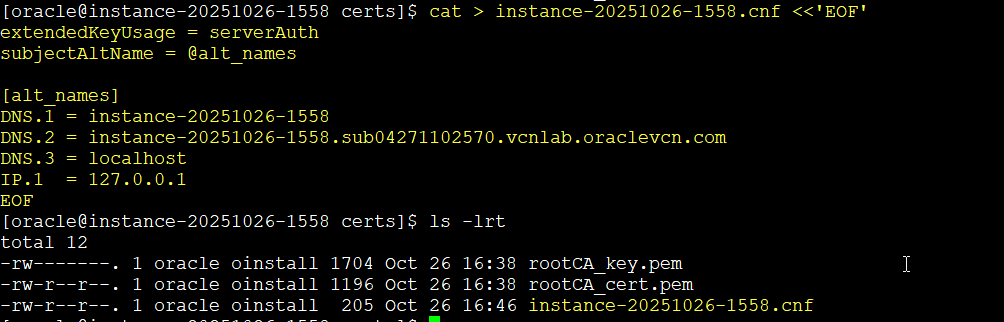
Generate the OpenSSL SAN Configuration
Pick your host’s real FQDN for the certificate. I’ll use instance-20251026-1558 as an example.
cat > instance-20251026-1558.cnf <<'EOF'
extendedKeyUsage = serverAuth
subjectAltName = @alt_names

[alt_names]
DNS.1 = instance-20251026-1558
DNS.2 = instance-20251026-1558.sub04271102570.vcnlab.oraclevcn.com
DNS.3 = localhost
IP.1  = 127.0.0.1
EOF
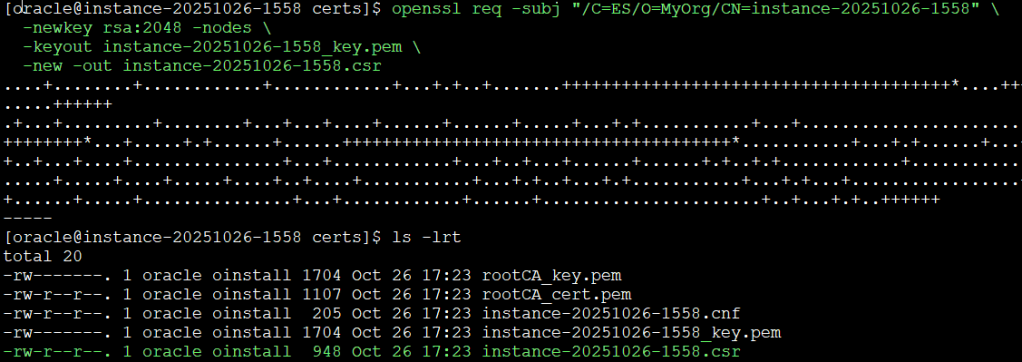
Generate the Server Key and CSR
openssl req -subj "/C=ES/O=MyOrg/CN=instance-20251026-1558" \
  -newkey rsa:2048 -nodes \
  -keyout instance-20251026-1558_key.pem \
  -new -out instance-20251026-1558.csr
Sign the Server Certificate
openssl x509 -CAcreateserial \
  -CA rootCA_cert.pem \
  -CAkey rootCA_key.pem \
  -req -in instance-20251026-1558.csr \
  -extfile instance-20251026-1558.cnf \
  -days 825 \
  -out instance-20251026-1558_cert.pem
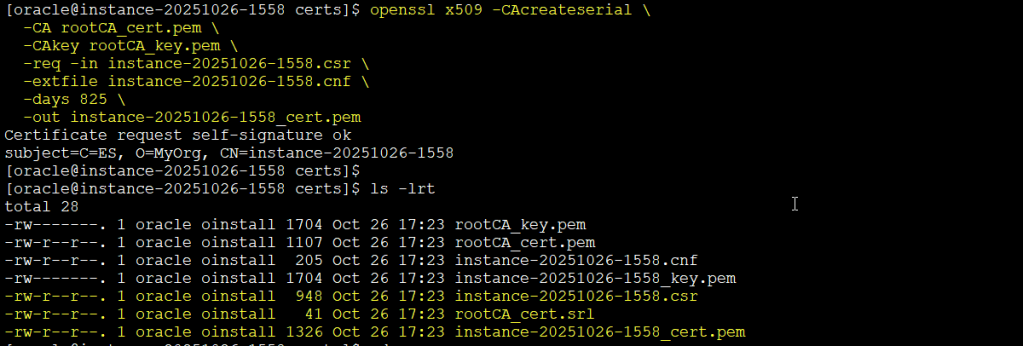
You now have:
- CA:
rootCA_cert.pem - Server:
instance-20251026-1558_cert.pemandinstance-20251026-1558_key.pem
Both files are stored in the Privacy Enhanced Mail (PEM) and the private key is created in a Public-Key Cryptography Standards (PKCS) #12 format. The server certificate and server private key are used within the Oracle GoldenGate deployment. The Common Name (CN) within the subject is using the hostname instance-20251026-1558 to uniquely identify the server.
Now, we can proceed with the deployment!
Creating a Silent GoldenGate Deployment with OGGCA
To create a deployment in silent mode you will need a response file. Unfortunately, I didn’t find the file in the ZIP or installation binaries, but fortunately Oracle provides a sample response file here: OGGCA Sample Template Response File for Silent Deployment
The sample file includes many parameters. I recommend reviewing the full list in Oracle’s documentation to understand every available option before customizing your response file.
After reviewing the options, your response file might look like this (simplified example):
oracle.install.responseFileVersion=/oracle/install/rspfmt_oggca_response_schema_v23_1_0
CONFIGURATION_OPTION=ADD
DEPLOYMENT_NAME=DEP23AI
ADMINISTRATOR_USER=oggadmin
ADMINISTRATOR_PASSWORD=**StrongPasswordHere**
DEPLOYMENT_ADMINISTRATOR_USER=oggadmin
DEPLOYMENT_ADMINISTRATOR_PASSWORD=**StrongPasswordHere**
SERVICEMANAGER_DEPLOYMENT_HOME=/u01/app/gg_deployments/ServiceManager
SERVICEMANAGER_ETC_HOME=/u01/app/gg_deployments/ServiceManager/etc
SERVICEMANAGER_CONF_HOME=/u01/app/gg_deployments/ServiceManager/etc/conf
SERVICEMANAGER_SSL_HOME=/u01/app/gg_deployments/ServiceManager/etc/ssl
SERVICEMANAGER_VAR_HOME=/u01/app/gg_deployments/ServiceManager/var
SERVICEMANAGER_DATA_HOME=/u01/app/gg_deployments/ServiceManager/var/lib/data
SERVICEMANAGER_ARCHIVE_HOME=/u01/app/gg_deployments/ServiceManager/var/lib/archive
HOST_SERVICEMANAGER=instance-20251026-1558
PORT_SERVICEMANAGER=9011
SECURITY_ENABLED=true
STRONG_PWD_POLICY_ENABLED=true
CREATE_NEW_SERVICEMANAGER=true
REGISTER_SERVICEMANAGER_AS_A_SERVICE=true
INTEGRATE_SERVICEMANAGER_WITH_XAG=false
EXISTING_SERVICEMANAGER_IS_XAG_ENABLED=false
ENABLE_SERVICE_MANAGER_REMOTE_METRICS=true
SERVICE_MANAGER_REMOTE_METRICS_LISTENING_HOST=localhost
SERVICE_MANAGER_REMOTE_METRICS_LISTENING_PORT=8125
CONFIGURATION_SERVICE_ENABLED=false
CONFIGURATION_SERVICE_BACKEND_TYPE=FILESYSTEM
CONFIGURATION_SERVICE_BACKEND_CONNECTION_STRING=
CONFIGURATION_SERVICE_BACKEND_USERNAME=
CONFIGURATION_SERVICE_BACKEND_PASSWORD=
CONFIGURATION_SERVICE_BACKEND_TABLE_NAME=
OGG_SOFTWARE_HOME=/u01/app/ogg23ai
OGG_DEPLOYMENT_HOME=/u01/app/gg_deployments/depogg23ai
OGG_ETC_HOME=/u01/app/gg_deployments/depogg23ai/etc
OGG_CONF_HOME=/u01/app/gg_deployments/depogg23ai/etc/conf
OGG_SSL_HOME=/u01/app/gg_deployments/depogg23ai/etc/ssl
OGG_VAR_HOME=/u01/app/gg_deployments/depogg23ai/var
OGG_DATA_HOME=/u01/app/gg_deployments/depogg23ai/var/lib/data
OGG_ARCHIVE_HOME=/u01/app/gg_deployments/depogg23ai/var/lib/archive
ENV_LD_LIBRARY_PATH=${OGG_HOME}/lib/instantclient:${OGG_HOME}/lib
ENV_TNS_ADMIN=/u01/app/gg_deployments/depogg23ai/etc
ENV_STREAMS_POOL_SIZE=
ENV_USER_VARS=
TLS_1_2_ENABLED=false
TLS_1_3_ENABLED=true
FIPS_ENABLED=false
SERVER_CERTIFICATE=/u01/app/ogg23ai/certs/instance-20251026-1558_cert.pem
SERVER_CERTIFICATE_KEY_FILE=/u01/app/ogg23ai/certs/instance-20251026-1558_key.pem
SERVER_CA_CERTIFICATES_FILE=/u01/app/ogg23ai/certs/rootCA_cert.pem
CLIENT_CERTIFICATE=
CLIENT_CERTIFICATE_KEY_FILE=
CLIENT_CA_CERTIFICATES_FILE=
ADMINISTRATION_SERVER_ENABLED=true
PORT_ADMINSRVR=9012
DISTRIBUTION_SERVER_ENABLED=true
PORT_DISTSRVR=9013
NON_SECURE_DISTSRVR_CONNECTS_TO_SECURE_RCVRSRVR=false
RECEIVER_SERVER_ENABLED=true
PORT_RCVRSRVR=9014
METRICS_SERVER_ENABLED=true
METRICS_SERVER_IS_CRITICAL=false
PORT_PMSRVR=9015
PMSRVR_DATASTORE_TYPE=BDB
PMSRVR_DATASTORE_HOME=/u01/app/gg_deployments/depogg23ai/pmsrvr
ENABLE_DEPLOYMENT_REMOTE_METRICS=true
DEPLOYMENT_REMOTE_METRICS_LISTENING_HOST=localhost
DEPLOYMENT_REMOTE_METRICS_LISTENING_PORT=8125
OGG_SCHEMA=oggadmin
REMOVE_DEPLOYMENT_FROM_DISK=false
Now, before running the command to create the deployment, we need to create our deployment directory and if you enable the performance and monitoring in the response file that directory as well, in this case: /u01/app/gg_deployments/depogg23ai/pmsrvr
mkdir -p /u01/app/gg_deployments/depogg23ai
mkdir -p /u01/app/gg_deployments/depogg23ai/pmsrvr
Then run the command:
cd /u01/app/ogg23ai/bin
./oggca.sh -silent -responseFile /u01/app/ogg23ai/response/oggca.rsp
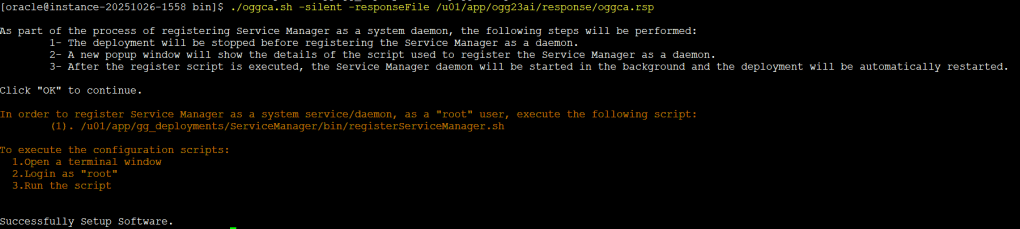
The installation takes just a few mins, so once it is completed make sure to follow instructions and run the command as root user in another terminal session

You can safely ignore the message bash: line 1: oggca.sh: command not found
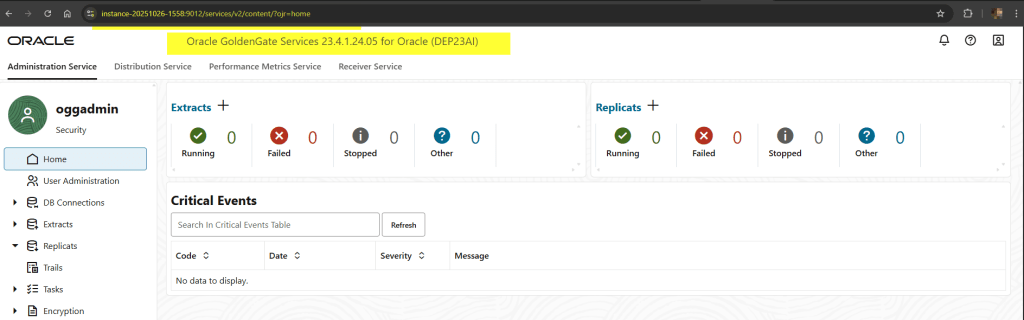
Once completed, check that the Service Manager and microservices were created successfully.
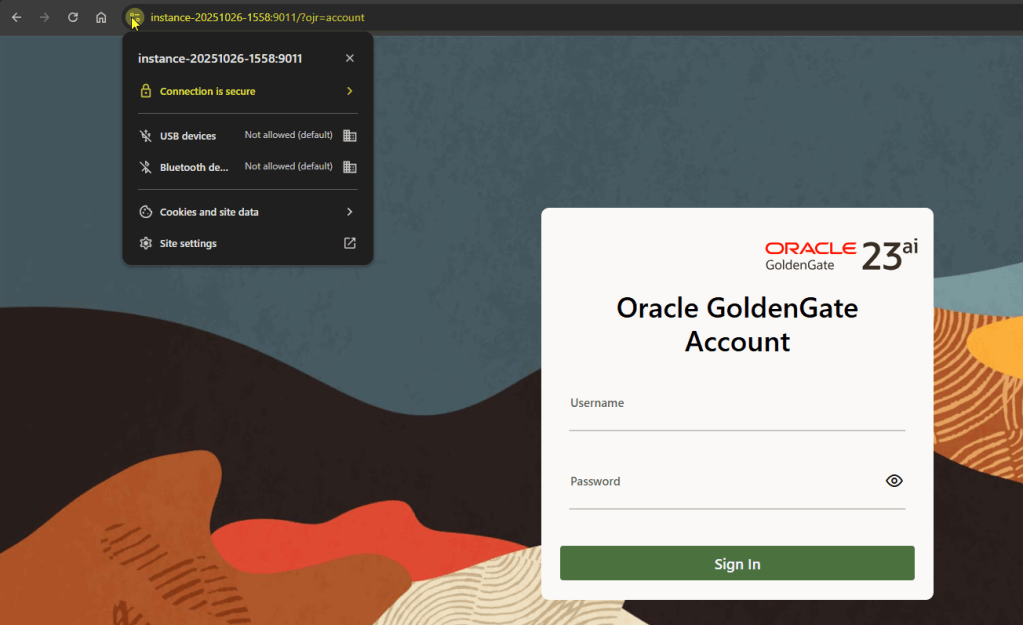
BTW, I have imported the certificate in my browser, so it is trusted!
In this demo, I imported my self-signed Root CA into my browser to remove the “Not Secure” warning. That’s perfectly fine for a lab or proof-of-concept setup, this approach keeps the setup simple and fully self-contained for a lab environment.
In production, organizations typically use certificates signed by a trusted Certificate Authority (CA) or an enterprise PKI, ensuring all client systems trust the connection without manual imports.
Conclusion: Automate, Secure, and Simplify
Silent and secure installations are a game-changer for Oracle GoldenGate 23ai. They let you standardize deployments across environments, automate builds, and keep everything protected from day one.
For lab or internal setups, self-signed certificates are perfectly fine and easy to manage. But in production, you should:
- Automate certificate renewals and deployment updates.
- Use certificates signed by a trusted Certificate Authority (CA).
- Use hostnames (FQDNs) instead of IPs in certificates.
With these steps in place, you now have a fully repeatable, scriptable, and secure Oracle GoldenGate 23ai installation ready for any enterprise environment.


Leave a reply to How to Securely Connect Oracle GoldenGate 23/26ai Microservices Deployments Using Distribution and Receiver Services – DatabaseVerse: Journey into the World of Databases Cancel reply