
There are already several blogs explaining how to download and use Oracle GoldenGate container images. One great example is Alex Lima’s post GoldenGate Container Images Now Available on Oracle Container Registry, I do recommend it to check it out.
But what happens when Oracle has not yet published the RU you need in the container registry, or when you need a specific older version that is no longer available?
As of today, these are the available images
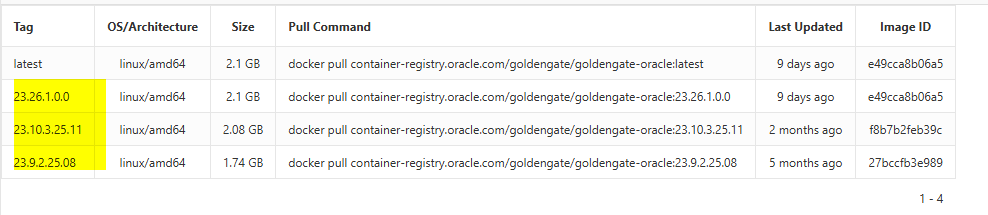
- 23.26.1.0.0 (26ai)
- 23.10.25.11
- And 23.9.25.08
If you are running a different RU, for example 23.8.0.25.04, and want to test or run it in containers, you need another approach.
This blog walks through exactly that scenario.
- How to Build Oracle GoldenGate Container Images
- Cloning the Oracle Docker Images GitHub Repository
- Building an Oracle GoldenGate Container Image
- Running Oracle GoldenGate in a Container
- Building an Image with a RU and One-Off Patch
- Conclusion
How to Build Oracle GoldenGate Container Images
Building a GoldenGate container image may sound complex at first, but the good news is that Oracle provides an official GitHub repository with Dockerfiles and scripts for many Oracle products, including GoldenGate.
In this blog, I focus specifically on Oracle GoldenGate and how to use that repository to build your own container image.
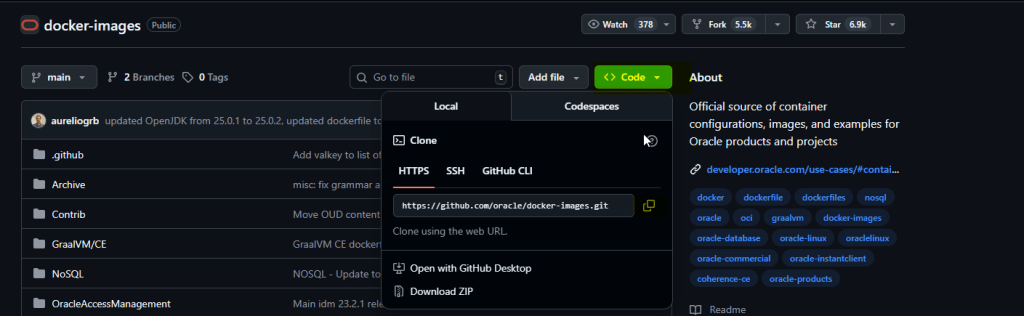
The GitHub repo url is this: GitHub Oracle Docker-images
Cloning the Oracle Docker Images GitHub Repository
I have already cloned the repo to use it and it is pretty straightforward.
I don’t want to go deep into Git; there is a lot of information about how to use it. But once you have it, you just need to clone it like this:
git clone https://github.com/oracle/docker-images.git

Once the repository is cloned, the next step is to locate the GoldenGate-specific Dockerfiles

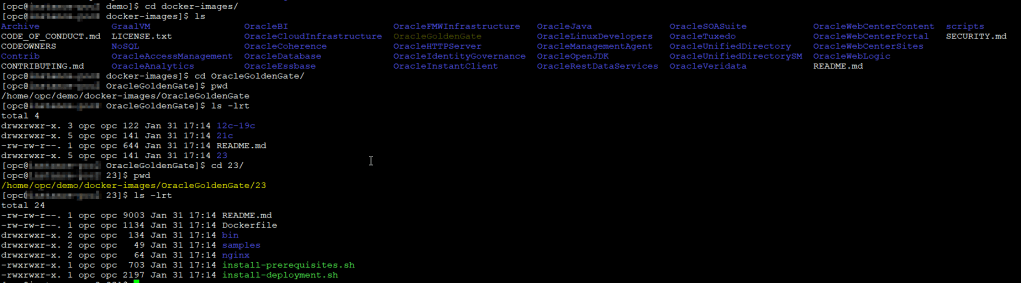
Inside the OracleGoldenGate/23 directory, you will find a Dockerfile for OGG 23 version. This file defines how the GoldenGate image is built, including environment variables, installation paths, and startup scripts.
You will also need Docker or Podman installed locally to build the image.
This is the DockerFile in the repo:
## Copyright (c) 2024, Oracle and/or its affiliates.
ARG BASE_IMAGE=oraclelinux:8
# hadolint ignore=DL3006
FROM ${BASE_IMAGE}
LABEL maintainer="Stephen Balousek<stephen.balousek@oracle.com>"
ARG INSTALLER
RUN : ${INSTALLER:?}
ENV OGG_HOME "/u01/ogg"
ENV OGG_DEPLOYMENT_HOME "/u02"
ENV OGG_TEMPORARY_FILES "/u03"
ENV OGG_DEPLOYMENT_SCRIPTS "/u01/ogg/scripts"
ENV PATH "${OGG_HOME}/bin:${PATH}"
COPY install-*.sh /tmp/
COPY ${INSTALLER} /tmp/installer.zip
COPY bin/ /usr/local/bin/
RUN bash -c /tmp/install-prerequisites.sh && \
bash -c /tmp/install-deployment.sh && \
rm -fr /tmp/* /etc/nginx
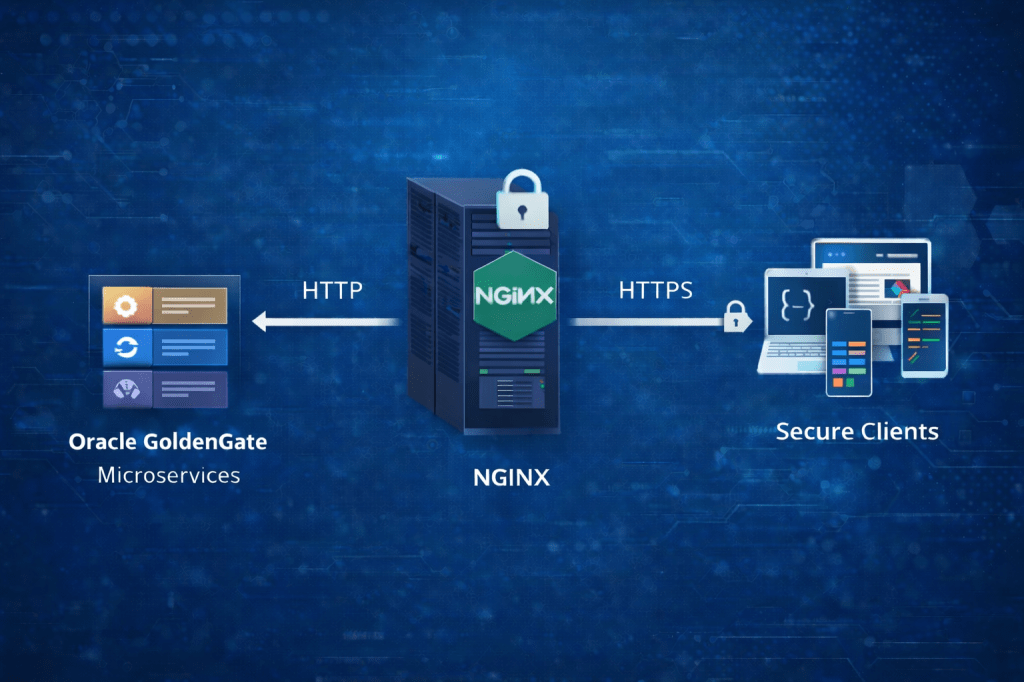
COPY nginx/ /etc/nginx/
EXPOSE 80 443
VOLUME [ "${OGG_DEPLOYMENT_HOME}", "${OGG_TEMPORARY_FILES}", "${OGG_DEPLOYMENT_SCRIPTS}" ]
HEALTHCHECK --start-period=90s --retries=1 \
CMD [ "/usr/local/bin/healthcheck" ]
ENTRYPOINT [ "/usr/local/bin/deployment-main.sh" ]
Understanding this Dockerfile helps explain what can and cannot be customized when building GoldenGate images
Building an Oracle GoldenGate Container Image
Prerequisites
To follow this guide, you will need Docker or Podman installed as mentioned early, access to Oracle GoldenGate installation media, and a basic understanding of container concepts.
To build an image you will need an OS BASE_IMAGE and the Oracle GoldenGate INSTALLER.
By default, the base OS image used to create the Oracle GoldenGate container image is oraclelinux:8. This can be changed using the BUILD_IMAGE build argument. For example:
docker build --tag=oracle/goldengate:23.4 \
             --build-arg BASE_IMAGE="localregistry/oraclelinux:8" \
             --build-arg INSTALLER=234000_fbo_ggs_Linux_x64_Oracle_services_shiphome.zip .
And there is a second arg that is the INSTALLER, you will need to download the Oracle GoldenGate software to build the image and then you can do it as follow:
$ docker build --tag=oracle/goldengate:23.4 \
               --build-arg INSTALLER=234000_fbo_ggs_Linux_x64_Oracle_services_shiphome.zip .
Sending build context to Docker daemon
...
Successfully tagged oracle/goldengate:23.4
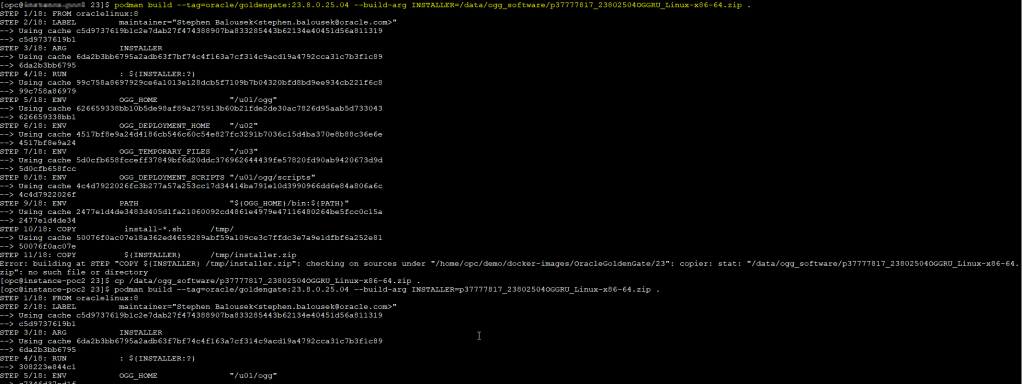
I have download the OGG software in the directory /data/ogg_software and like I mentioned previously I will use the OGG RU 23.8.0.25.04 for the purpose of this demo.

One important detail is that the GoldenGate installer ZIP must be inside the Docker build context. Oracle’s Dockerfile expects the installer to be available locally, otherwise the build will fail. So copy the zip into the directory in that’s it
podman build --tag=oracle/goldengate:23.8.0.25.04 --build-arg INSTALLER=/data/ogg_software/p37777817_23802504OGGRU_Linux-x86-64.zip .
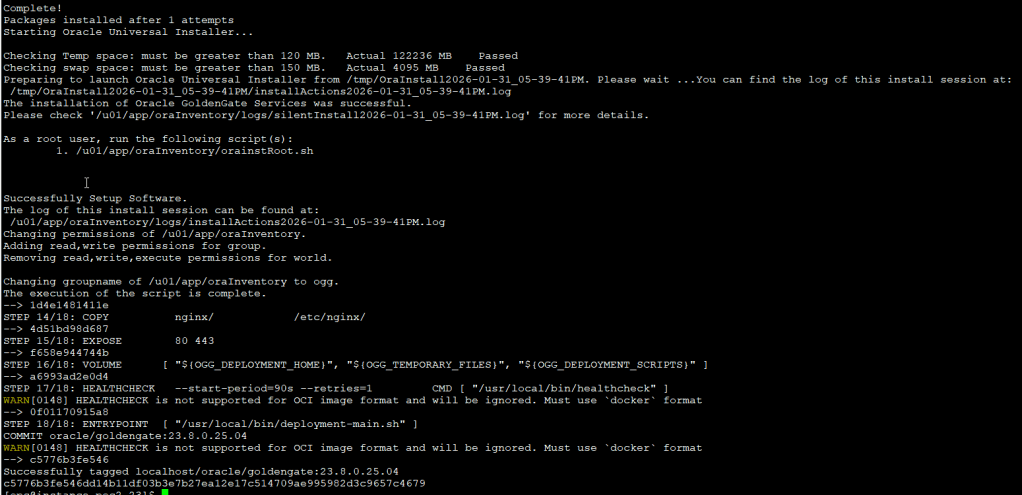
As you can see above, the container image has been built!
You can check it out running the podman images command as follow:
podman images

The next step is to run the image and start a GoldenGate deployment.
Running Oracle GoldenGate in a Container
When you run the container without additional parameters, Oracle GoldenGate starts with a set of defaults:
$ docker run -p 80:80 -p 443:443 container-registry.oracle.com/goldengate/goldengate-oracle-:latest
----------------------------------------------------------------------------------
--  Password for OGG administrative user 'oggadmin' is 'xxxxxxxx'
----------------------------------------------------------------------------------
...
Default options:
- Auto-generated container name
- 80 port for HTTP Server
- 443 port for HTTPS Server
- ‘oggadmin’ for the name of the administrative account
- Auto-generated the password for the administrative account
- ‘Local’ for the name of the deployment
- Use container storage for /u02 and /u03 volume
- Auto-generated self-signed certificate
Advanced Image Usage and Configuration
$ docker run \ --name <container name=""> \ -p <host port="">:80 \ -p <host port="">:443 \ -e OGG_ADMIN=<admin user="" name=""> \ -e OGG_ADMIN_PWD=<admin password=""> \ -e OGG_DEPLOYMENT=<deployment name=""> \ -e OGG_DOMAIN=<domain name=""> \ -v [<host mount="" point="">:]/u02 \ -v [<host mount="" point="">:]/u03 \ -v [<host mount="" point="">:]/etc/nginx/cert \ container-registry.oracle.com/goldengate/goldengate-oracle-:latest
Parameters:
--name <container name="">– A name for the new container (default: auto generated)-p <host-port>:80– The host port to map to the Oracle GoldenGate HTTP server (default: no mapping)-p <host-port>:443– The host port to map to the Oracle GoldenGate HTTPS server (default: no mapping)-e OGG_ADMIN– The name of the administrative account to create (default:oggadmin)-e OGG_ADMIN_PWD– The password for the administrative account (default: auto generated)-e OGG_DEPLOYMENT– The name of the deployment (default:Local)-e OGG_DOMAIN– The domain name to use for the self-signed certificate (default: hostname of the container). Not needed if you bring your own ssl certificates.-v /u02– The volume used for persistent GoldenGate data (default: use container storage)-v /u03– The volume used for temporary GoldenGate data (default: use container storage)-v /etc/nginx/cert– The volume used for storing the SSL certificate for the HTTPS server (default: create a self-signed certificate)
See the following sections for additional details.
Data Storage Volumes
- /u01 – The volume for GoldenGate system
- /u02 – The volume for persistent GoldenGate data
- /u03 – The volume for temporary GoldenGate data
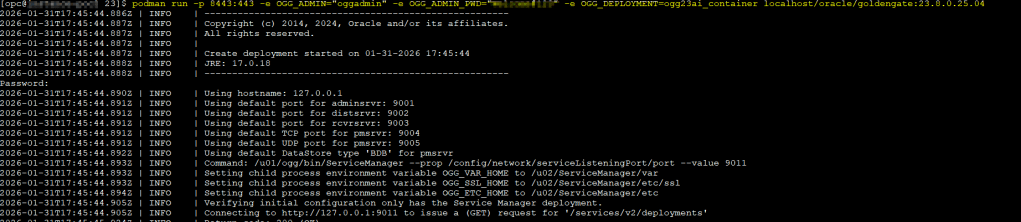
This is an example using the local image I have created:
podman run -p 8443:443 -e OGG_ADMIN="oggadmin" -e OGG_ADMIN_PWD="*****" -e OGG_DEPLOYMENT=ogg23ai_container localhost/oracle/goldengate:23.8.0.25.04

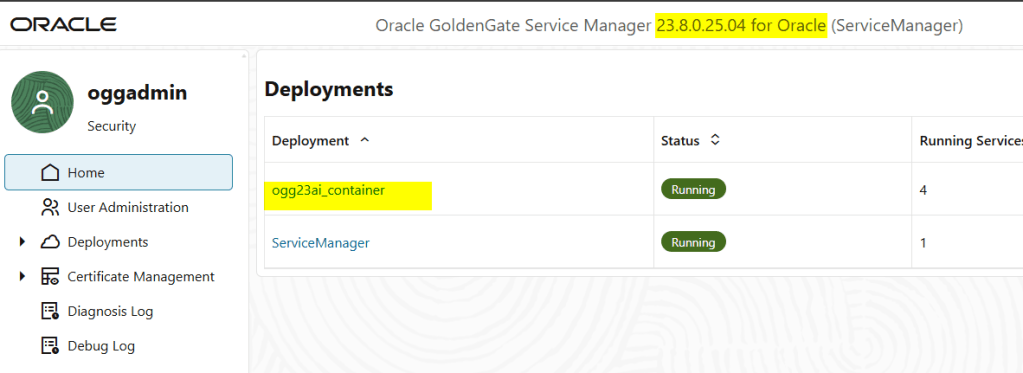
And as you can see, is the version I have built:
Building an Image with a RU and One-Off Patch
At the moment, the official Oracle GoldenGate Dockerfile supports only two build arguments: the base OS image and the GoldenGate installer ZIP.
In real scenarios, however, there are cases where you may need to apply a one-off patch on top of a Release Update. It is technically possible to build a container image that includes one-off patches, but doing so requires modifying the Dockerfile and adding additional files and logic to the repository.
This approach goes beyond the standard, out-of-the-box setup provided by Oracle. While it works from a technical perspective, it should be considered a custom build, and its supportability must be evaluated carefully.
I will cover this topic in detail in a follow-up post, where I’ll walk through how to build GoldenGate container images with one-off patches, the required Dockerfile changes, and the implications around maintenance and support.
Note added 23/Feb/2026: blog to follow up here: Oracle GoldenGate Containers and One-Off Patches: The Missing Piece
For now, it’s important to be aware that this scenario exists and that it introduces additional considerations compared to using the official images as provided.
Conclusion
Running Oracle GoldenGate in containers is absolutely possible and fully supported when using Oracle’s official images and base operating systems. When the required RU is not available in Oracle Container Registry, building your own image using the official Dockerfiles is a practical and reliable alternative.
In this post, we walked through cloning Oracle’s Docker images repository, building a GoldenGate container images with a specific RU, and running it using Docker or Podman. This approach works well for labs, testing, and production scenarios, as long as the limitations around patching and support are clearly understood.
More advanced scenarios, such as building images that include one-off patches, are possible but require customizations that go beyond the standard setup. Those cases deserve a dedicated discussion, which I will cover in an upcoming post.
Before moving to production, always validate your image, define a clear update strategy, and align your approach with Oracle support policies. Containers simplify deployment, but they do not remove the need for careful operational planning.

Leave a comment