

I usually write about Oracle databases and Oracle Engineering Systems, but not much about OCI. The funny thing is, I use OCI quite often. I’m not a DevOps expert, I just know the basics, but whenever I need to make something work I end up learning along the way. That’s exactly what happened here, and I thought… why not turn it into a blog post?
So what’s the story? I needed to connect an instance in a public subnet of Virtual Cloud Network A (VCNA) to another instance in a private subnet of VCNB. I’m sure there are already posts out there about this, but I still wanted to share my take. If it helps someone else down the road, then mission accomplished!
A quick detour: what’s local peering?
Before jumping into the setup, let’s take a moment to talk about local peering in OCI. In simple words, local peering is what lets two Virtual Cloud Networks (VCNs) in the same region talk to each other privately. Instead of sending traffic over the internet or through a Dynamic Routing Gateway (DRG), they can exchange packets directly inside Oracle’s backbone network.
So when do you actually need it? A few common cases are:
- You’ve split environments into different VCNs (say dev and prod) but still need some controlled communication between them.
- You want to connect an instance in a public subnet with another in a private subnet that lives in a different VCN.
- You’re just trying to keep things cleaner by organizing workloads into separate networks without losing the ability to connect them.
Why bother with local peering instead of another option?
Mainly because it’s faster and more secure. The traffic never leaves Oracle’s backbone, so you avoid internet exposure and keep latency low. And since local peering traffic stays inside the region, it doesn’t count against your data egress quota.
That’s the idea in a nutshell. Now, let’s see how to actually make it work.
Setting it up
Now that we know what local peering is and why it’s useful, let’s roll up our sleeves and set it up. In my case, as mentioned early I needed to connect an instance in a public subnet of VCNA to another instance in a private subnet of VCNB. The process is straightforward once you know where to click, but there are a couple of details you need to get right for it to actually work.
My Setup
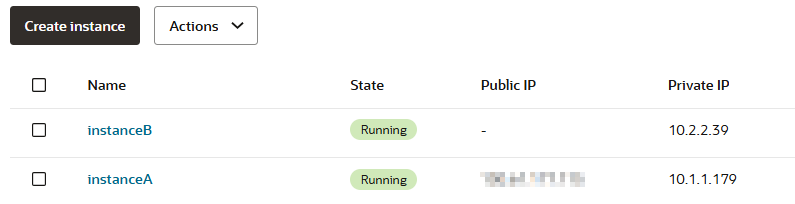
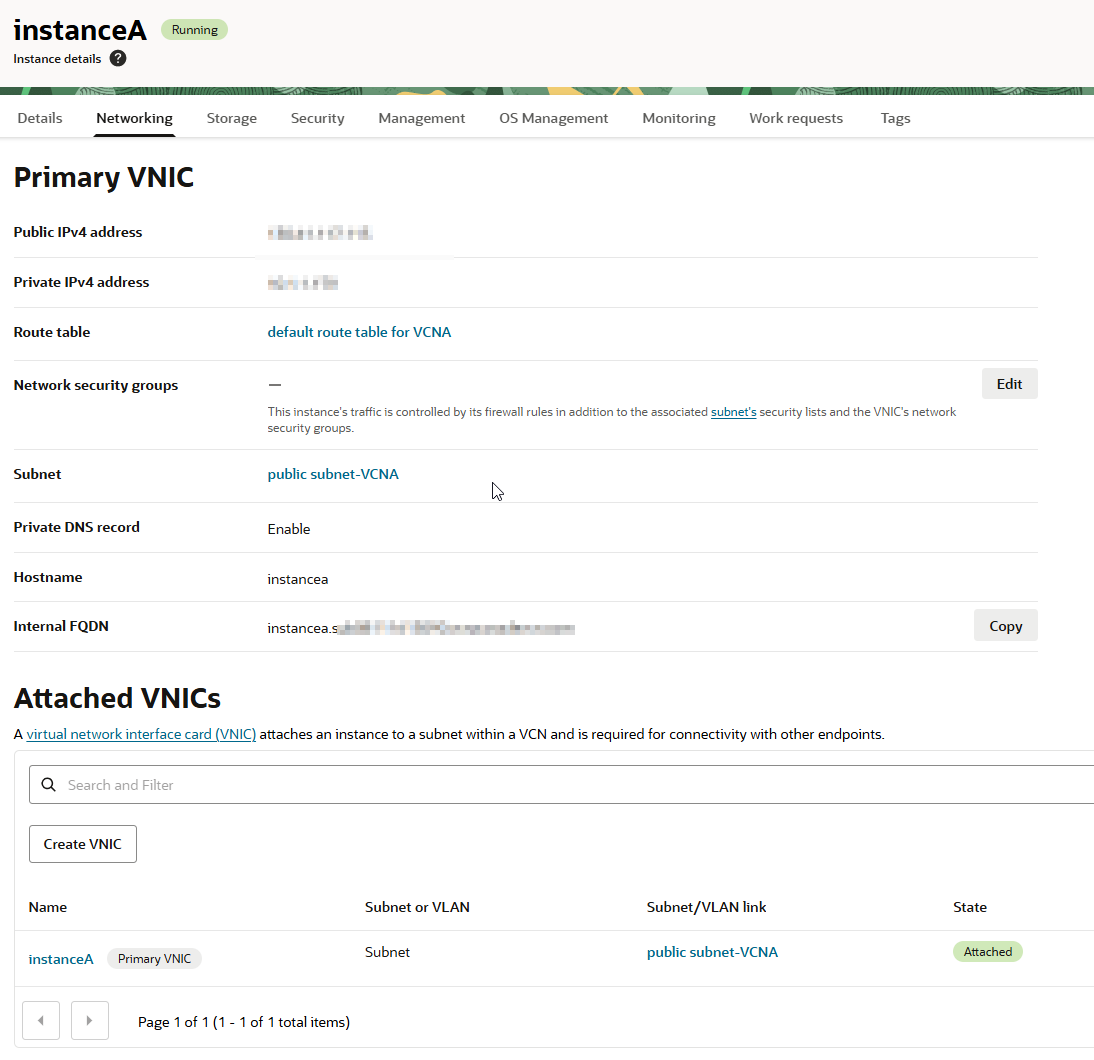
I have two instances:
- InstanceA on a public subnet in VCNA
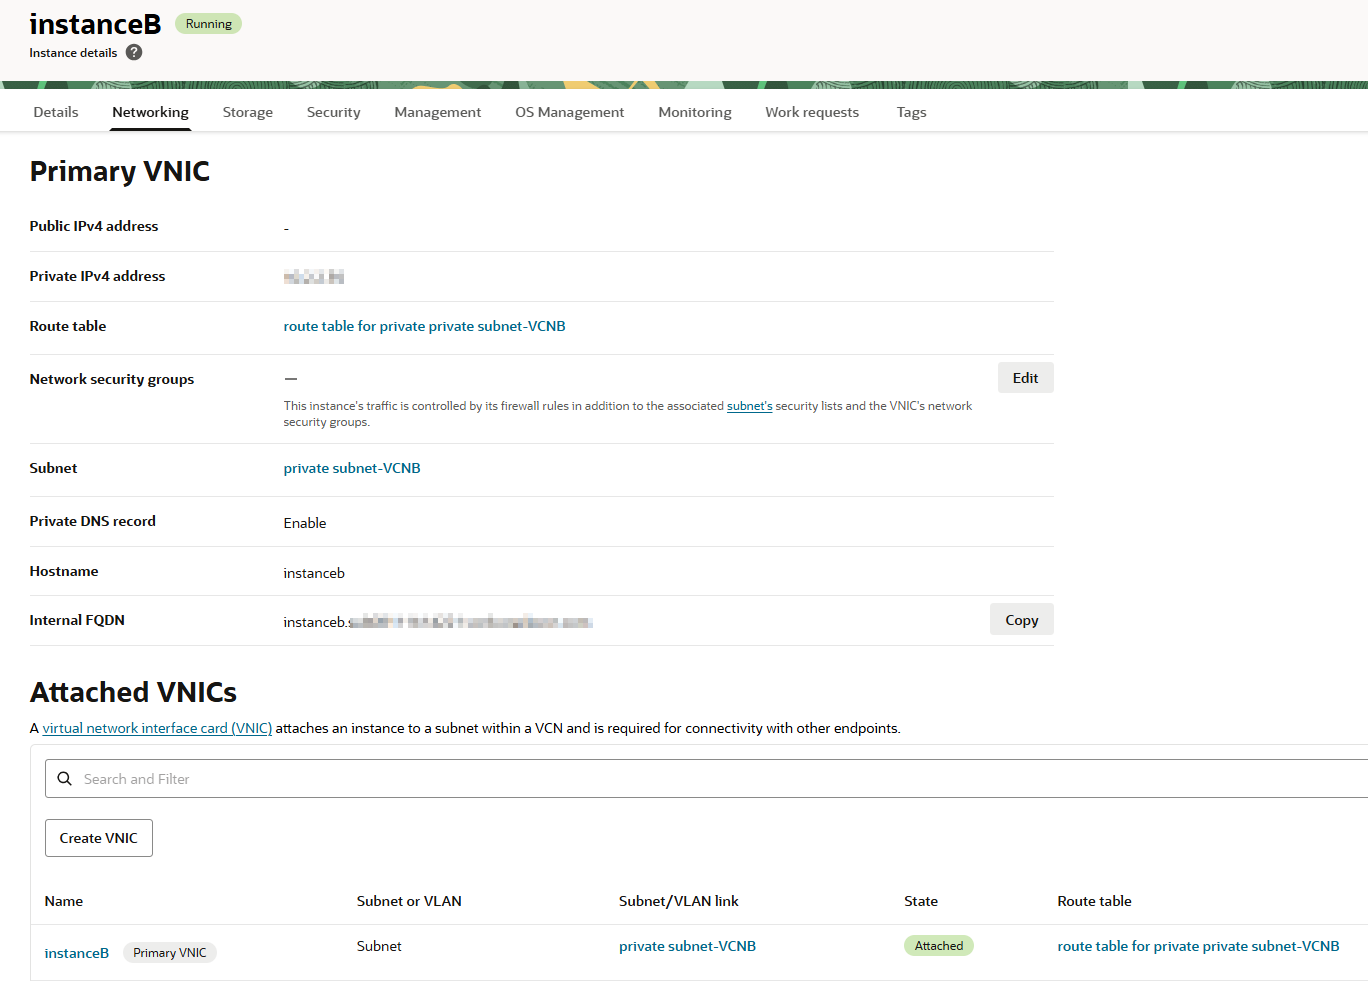
- InstanceB on a private subnet in VCNB
Confirm there’s no connection yet
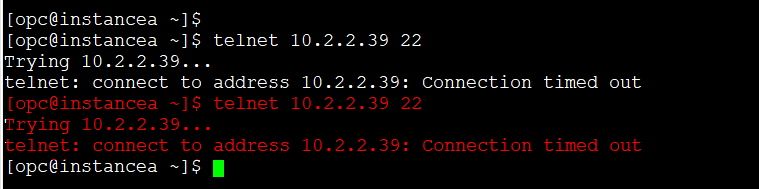
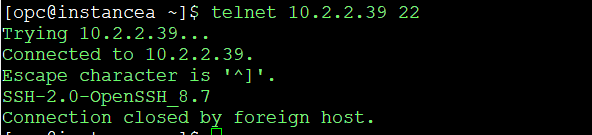
First, let’s demonstrate that I’m not able to connect from InstanceA to InstanceB.

As you can see, the connection times out. Even if I tweak the security list or the network security group for the private subnet where InstanceB lives, it won’t work. That’s exactly the purpose of this demo: to show why local peering is required.
Check the security list
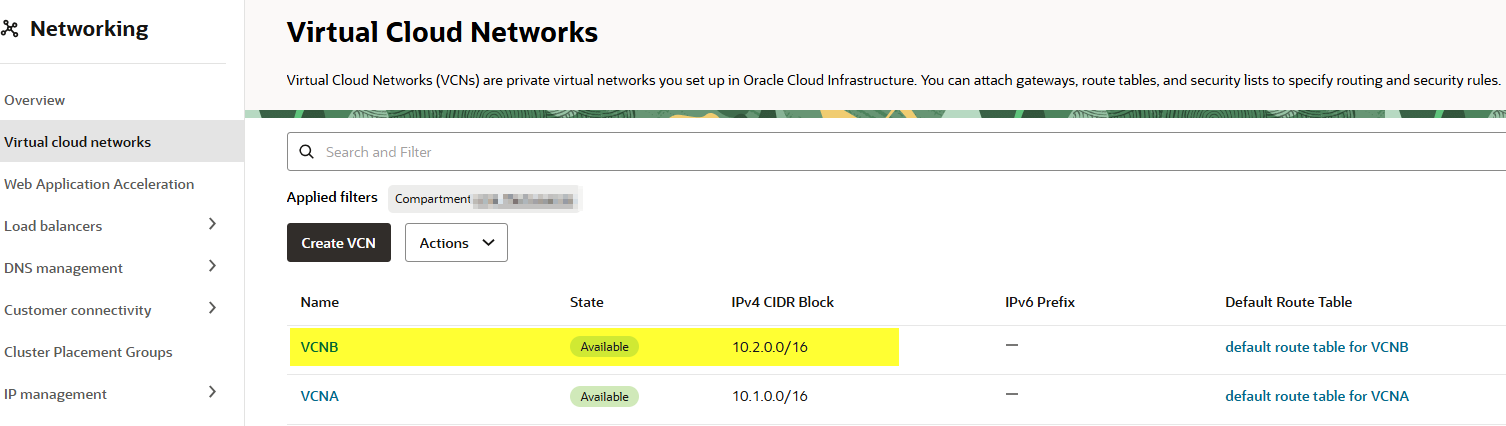
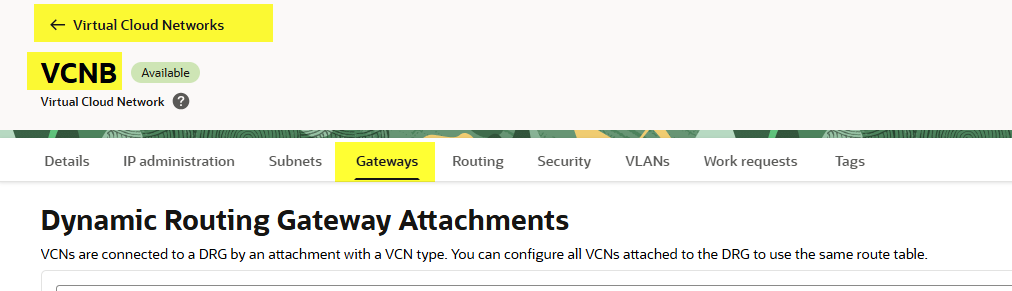
Go to Networking → Virtual Cloud Networks → VCNB.
Under the Security tab, click the security list for the private subnet.
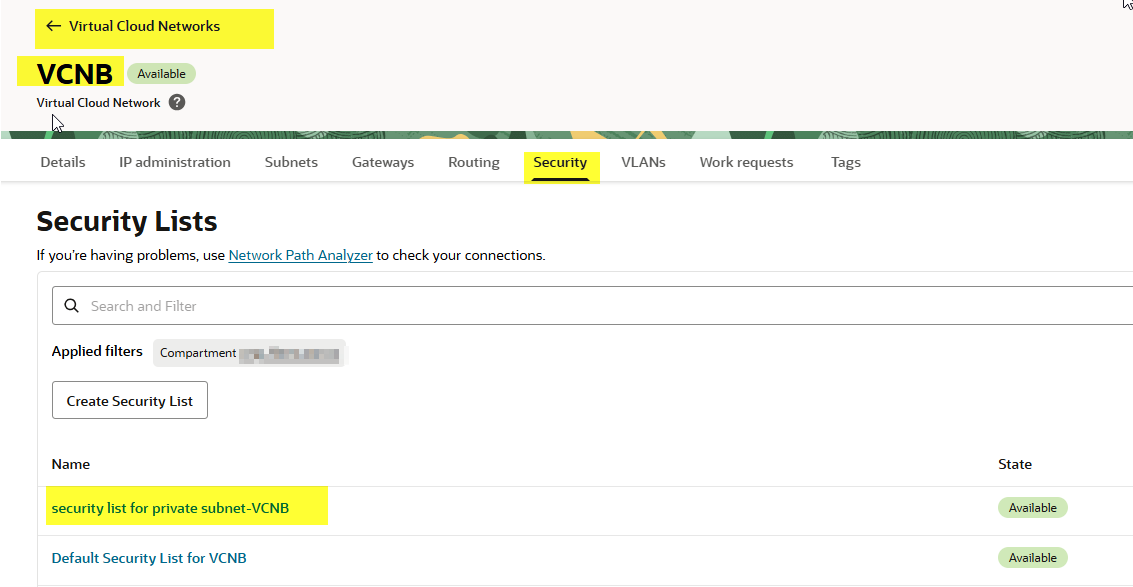
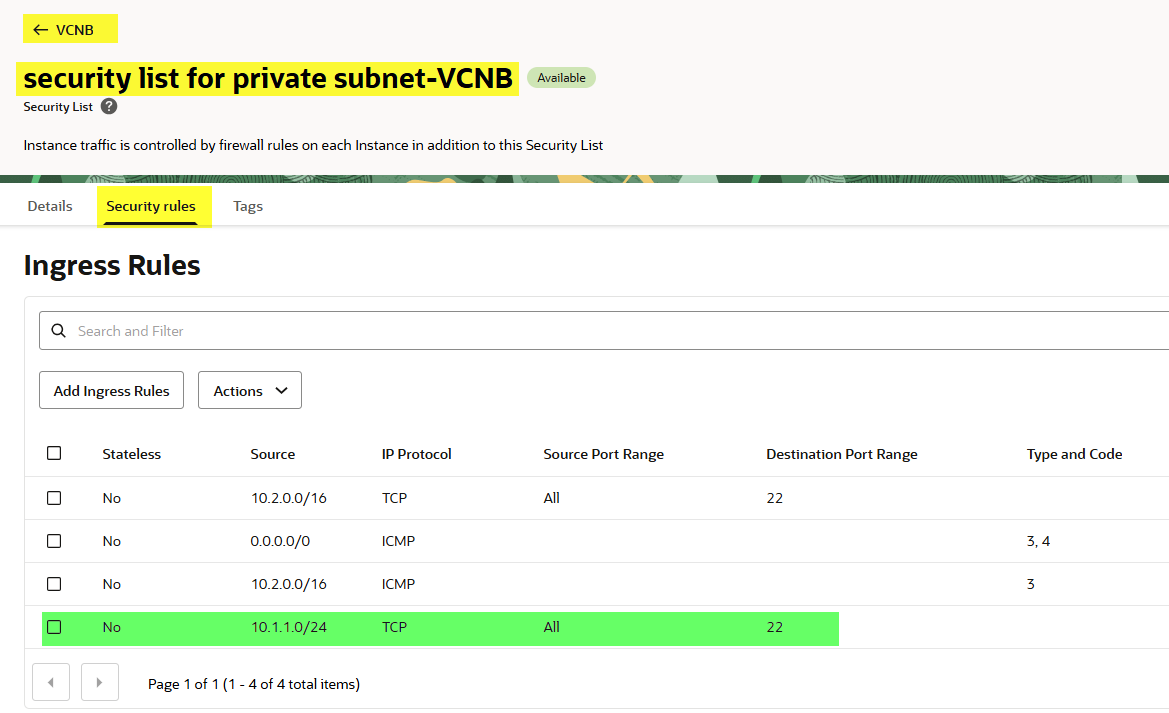
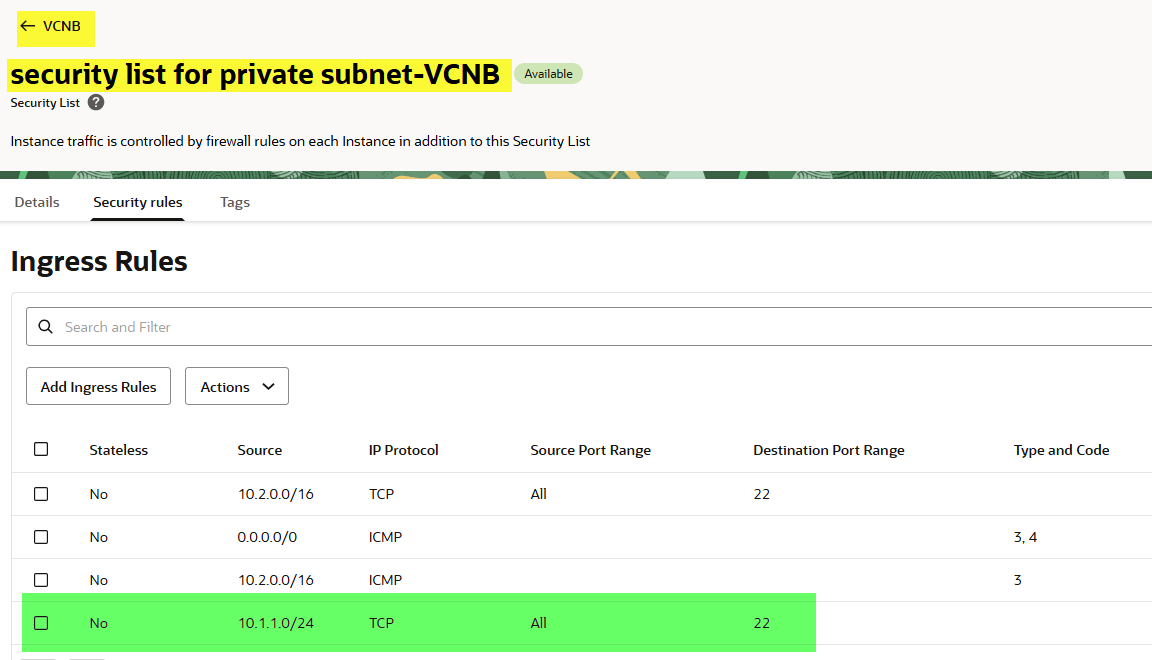
Now, let’s take a look in the security list in the ingress rule section what we have:
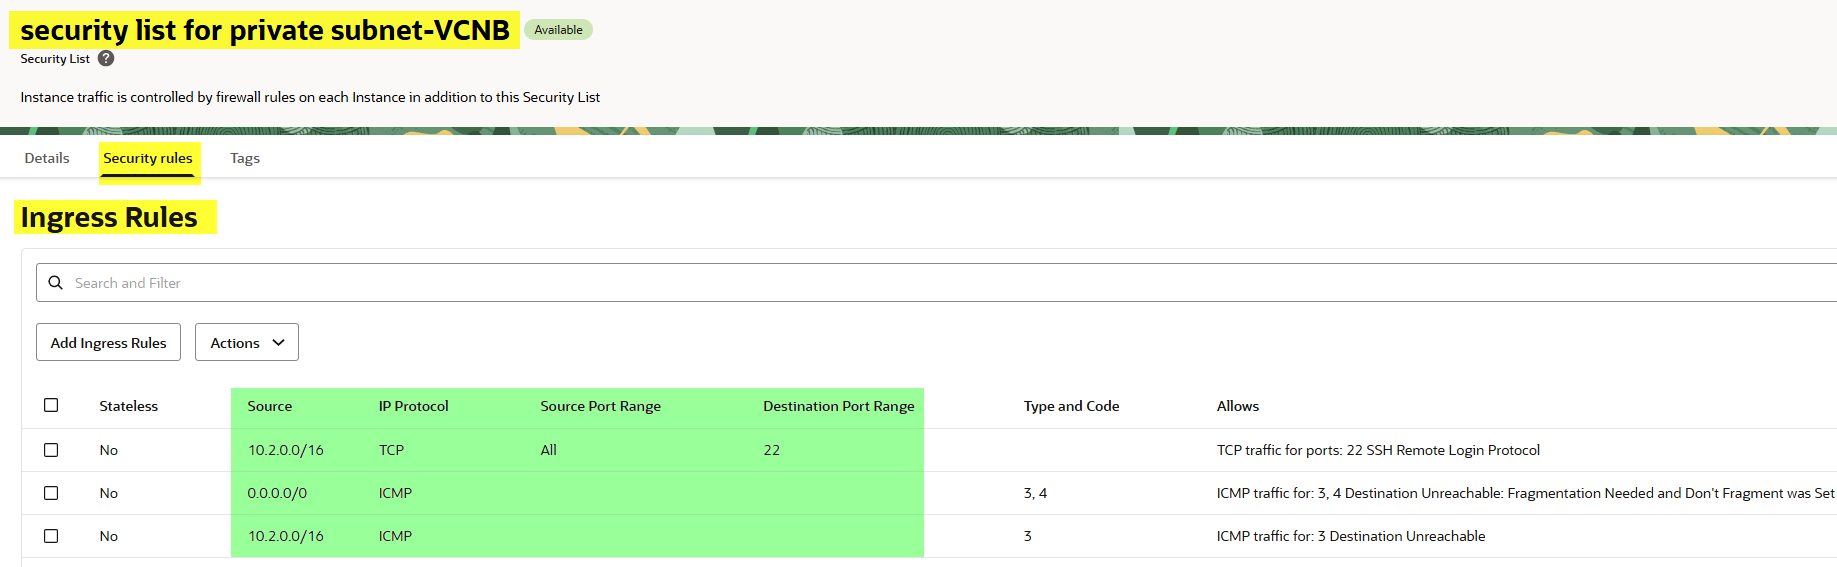
As shown above, only addresses from the CIDR block 10.2.0.0/16 are allowed to access port 22 (SSH).
Add ingress rule for VCNA
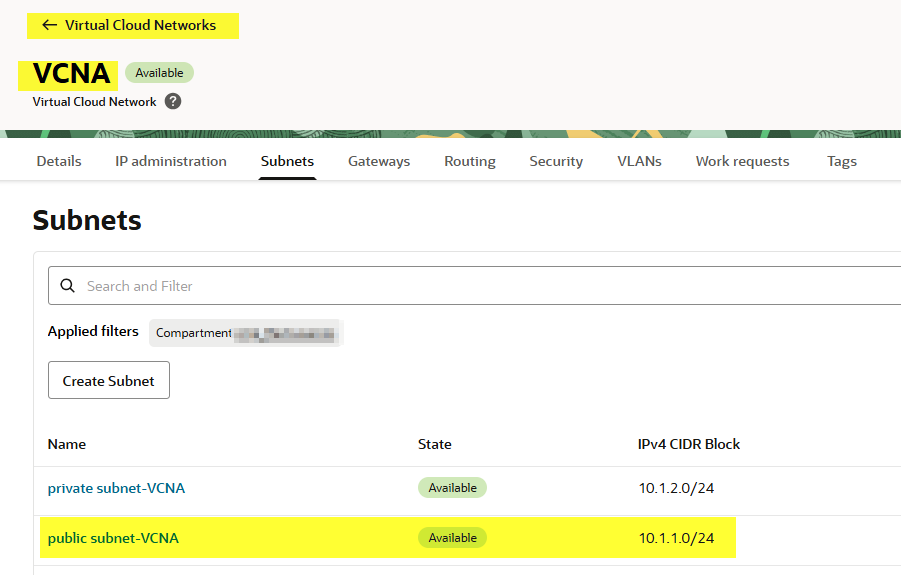
Now let’s add the CIDR block of the public subnet where InstanceA resides (10.1.1.0/24).
Navigate to: VCNB → Security List for the private subnet → Security Rules → Ingress Rules and add a new rule.

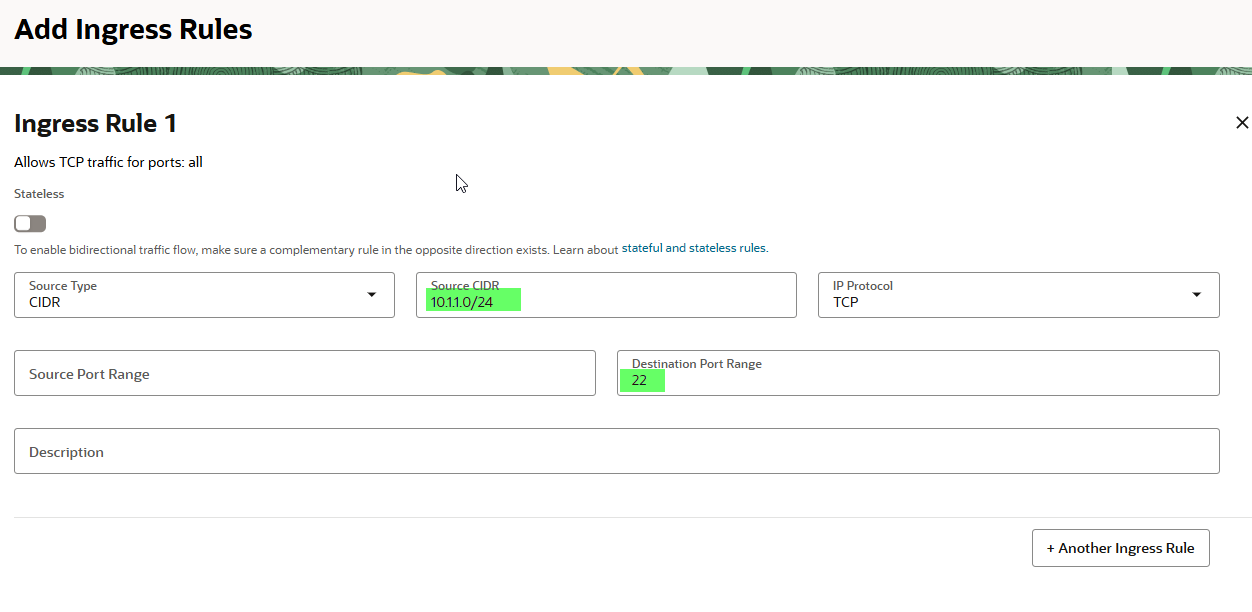
Click the Add Ingress Rules button.
Let’s take a look now:
After applying, try the connection again… still no luck! Why? Because the instances are in different VCNs. That’s where local peering comes in.
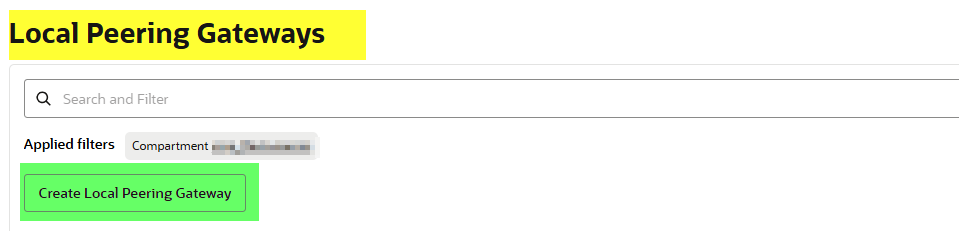
Create Local Peering Gateways
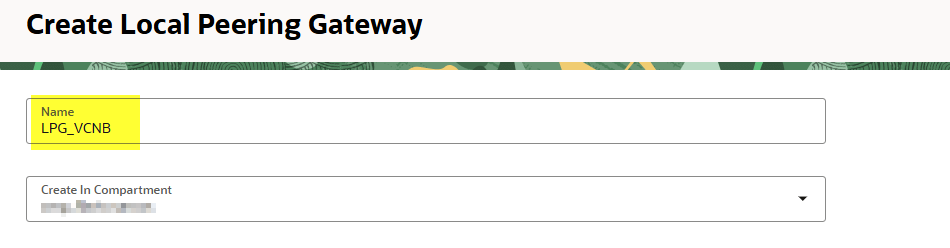
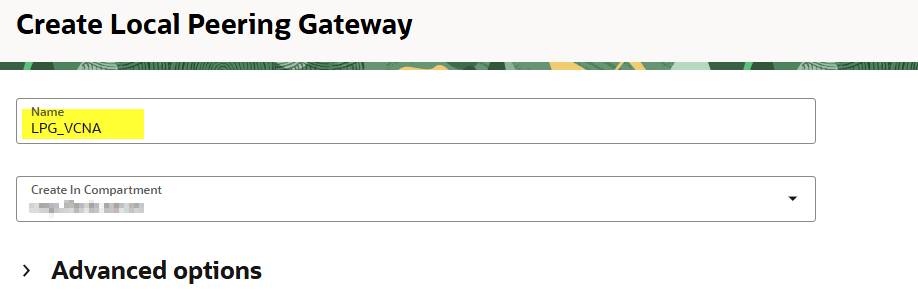
Go to both VCNs (VCNA and VCNB) and create a Local Peering Gateway (LPG) in each one. Give them a name and select the correct compartment.
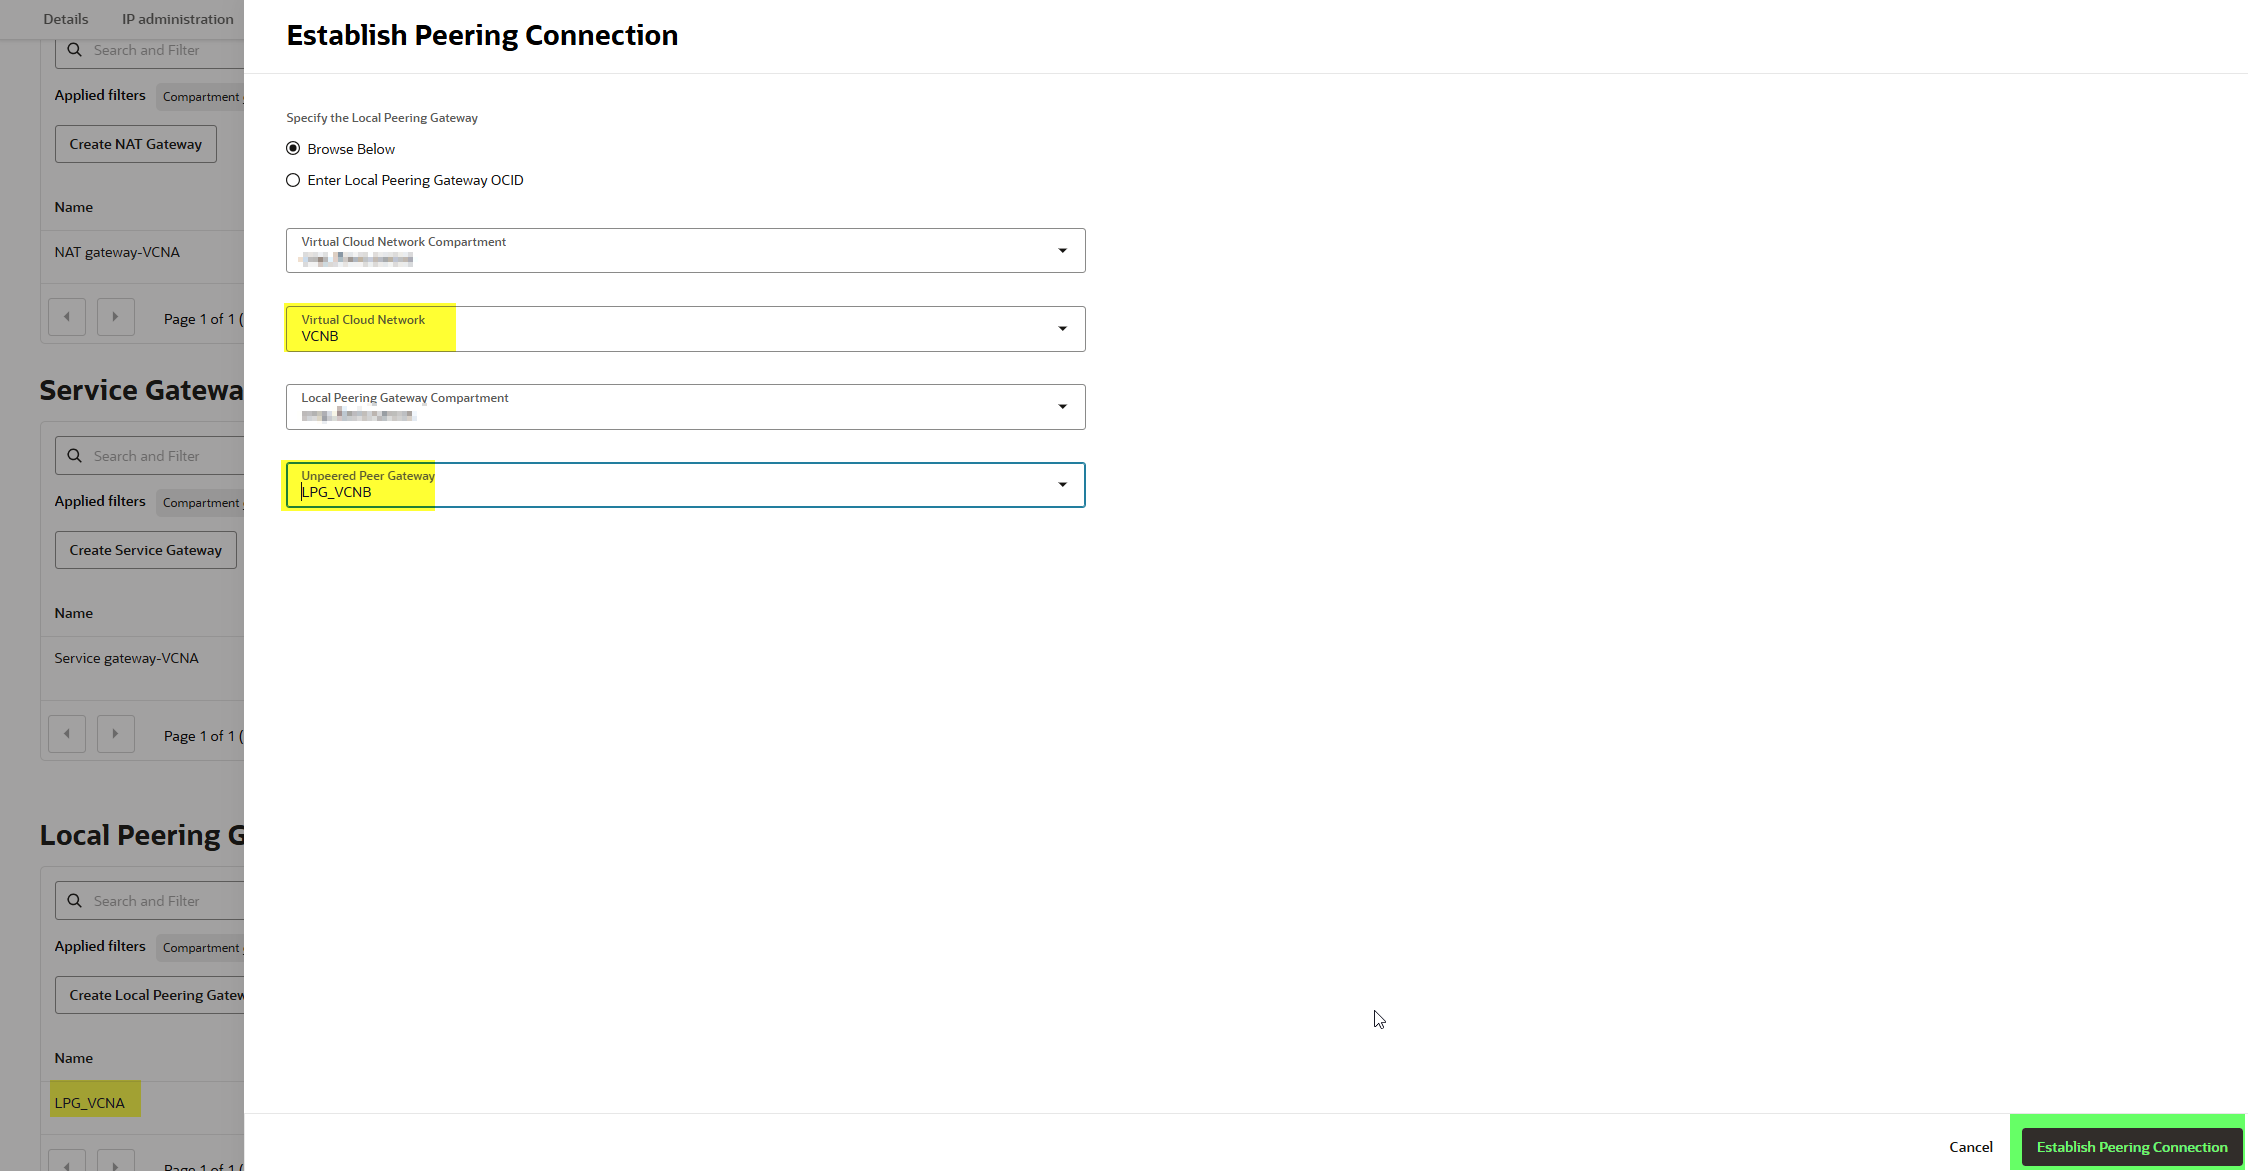
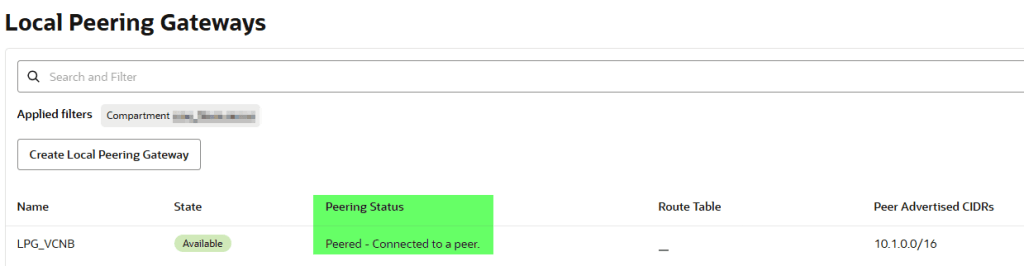
Once both gateways exist, select one of them and choose Establish Peering Connection. Point it to the other VCN’s gateway and confirm.
Once you have created both local peering gateway, select one of them and select “Establish Peering Connection”

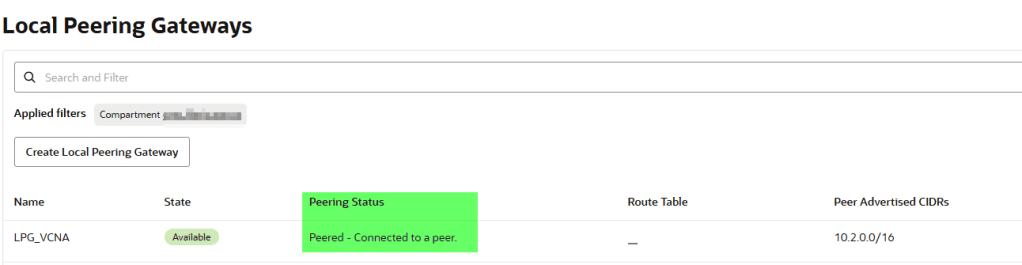
If everything is configured correctly, the status will show: Peered – Connected to a peer.
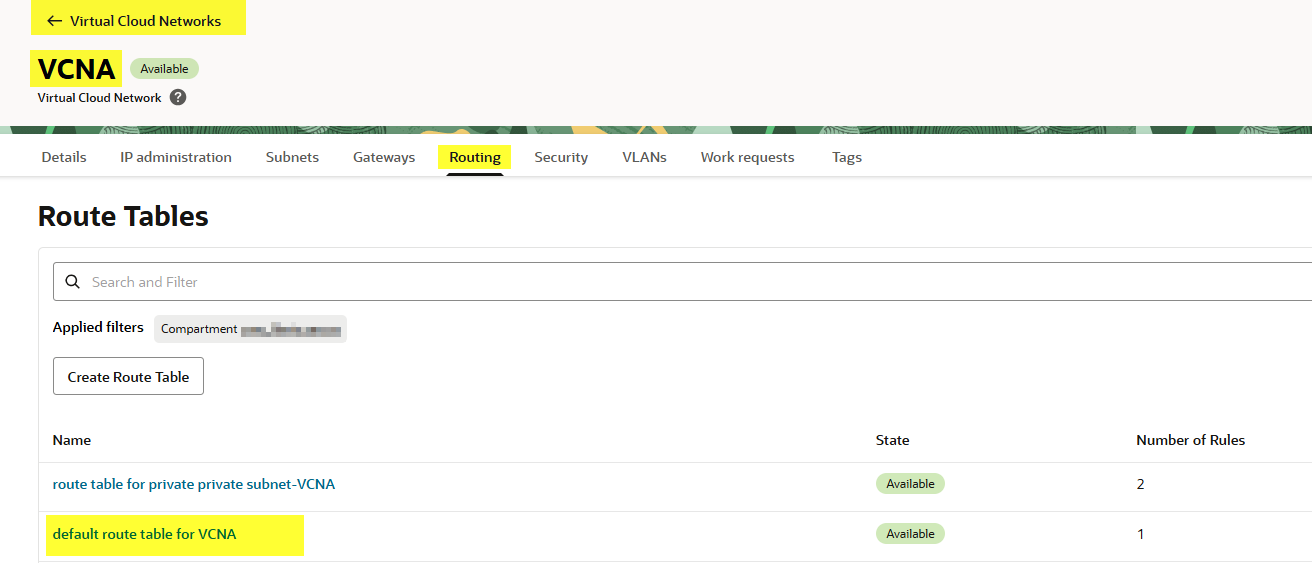
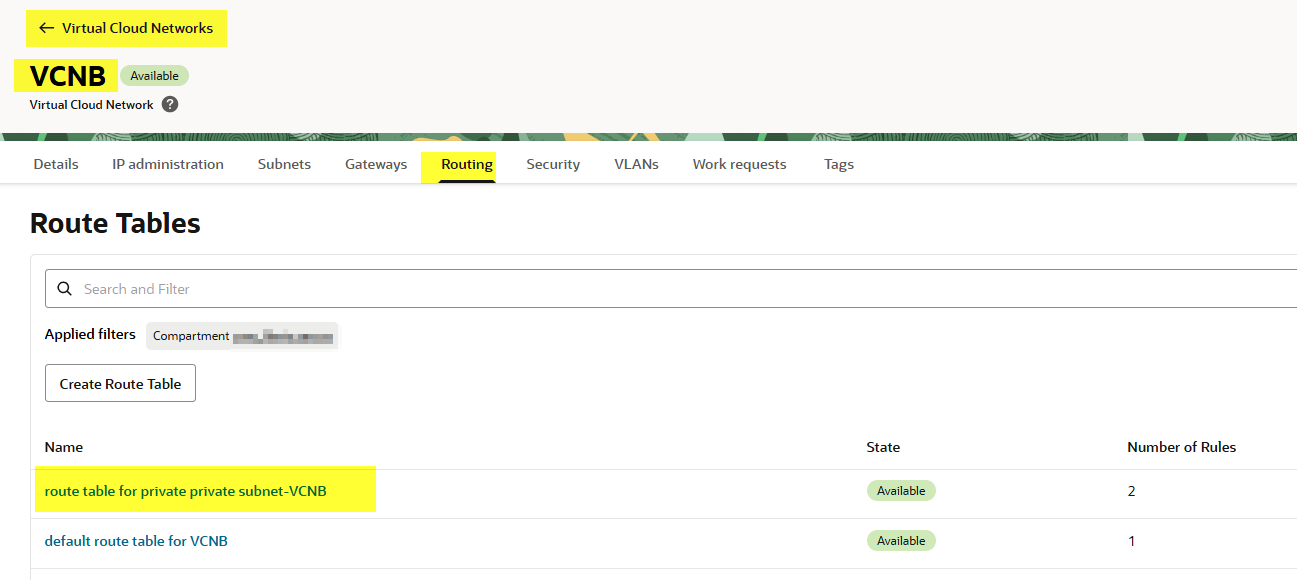
Update route tables
We’re not done yet. We need to tell each subnet how to reach the other.
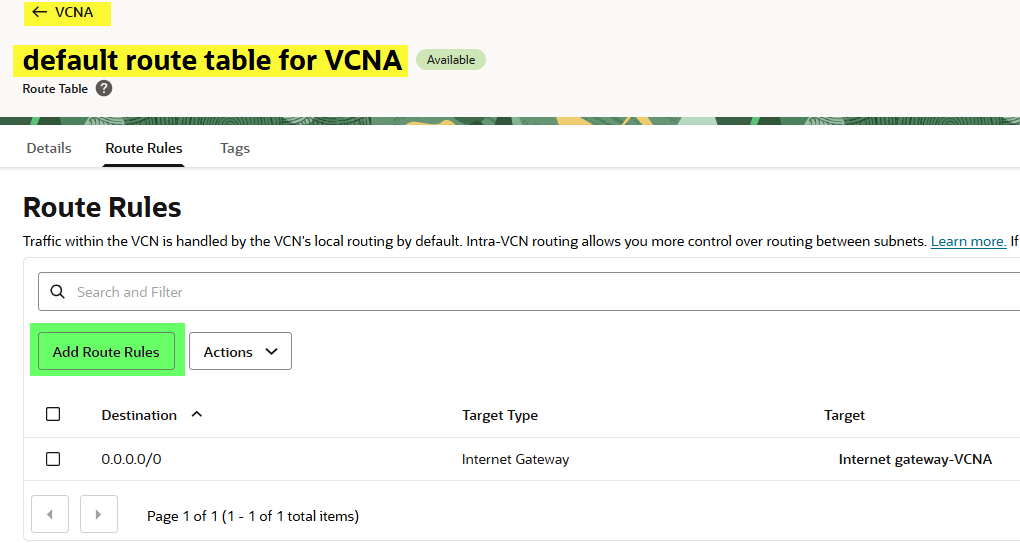
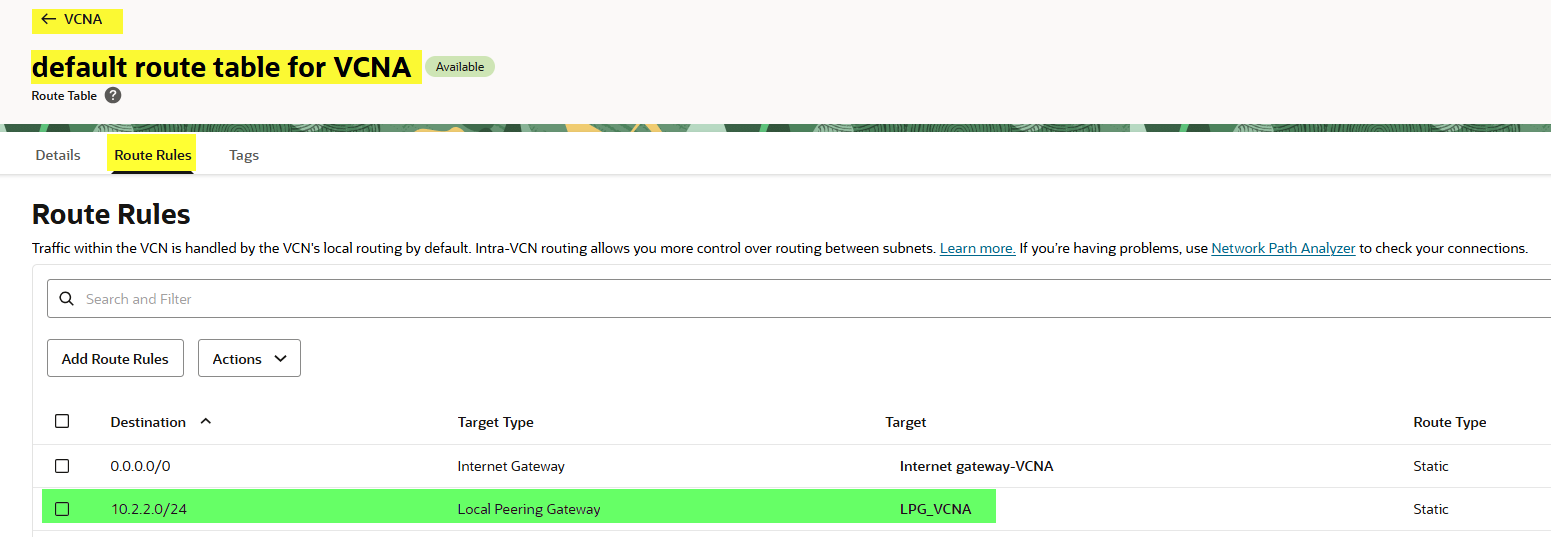
- In VCNA, update the public subnet route table so traffic to
10.2.0.0/16is routed through the LPG. - In VCNB, update the private subnet route table so traffic to
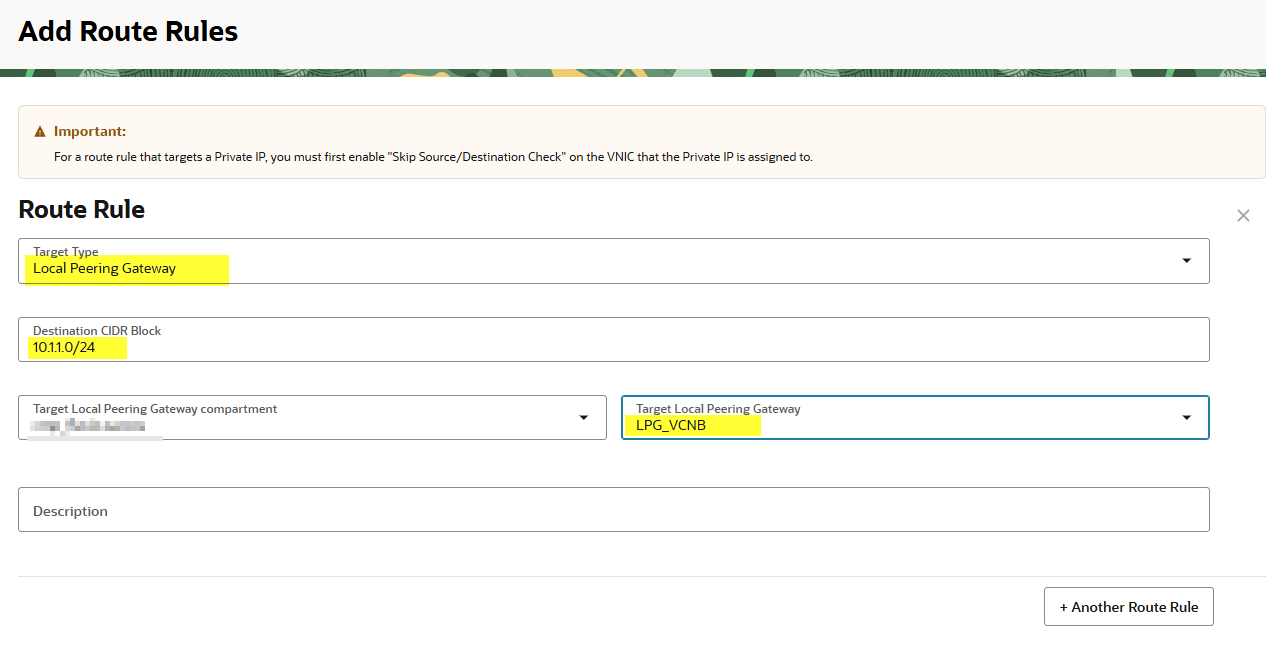
10.1.1.0/24is routed back through its LPG.
Routing must be bidirectional. Even if only VCNA initiates the connection, the replies from VCNB must know how to get back.

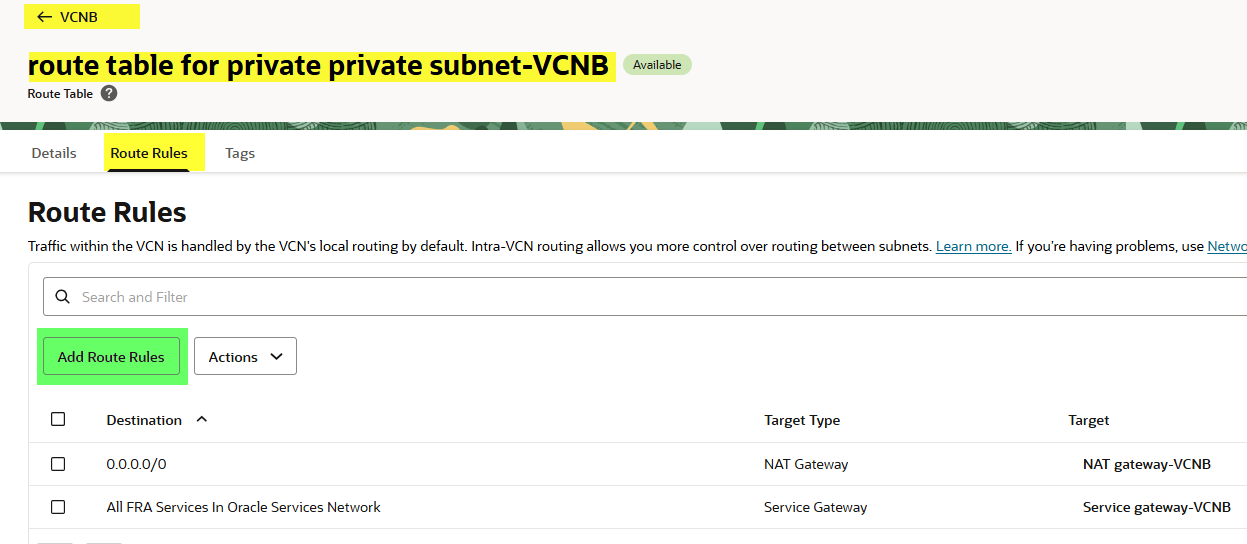
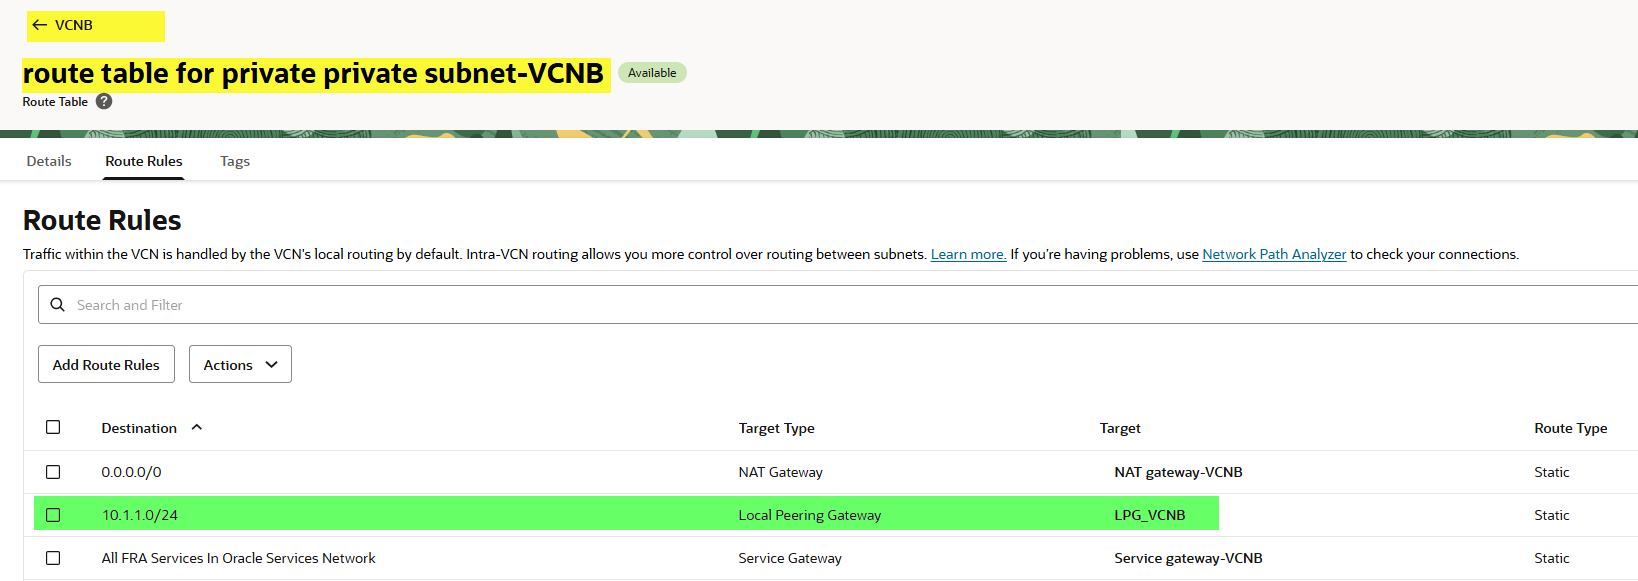
On VNCB let’s do the same but in the private subnet in this case
Even if only VCNA will initiate connections, the TCP replies from VCNB must know how to get back to VCNA. Routing must be bidirectional
Validate security rules
Double-check the ingress rules in the private subnet of VCNB. Remember, if you are using a Network Security Group (NSG) instead of security lists, you’ll need to allow the rule there. Otherwise, security lists will be ignored.
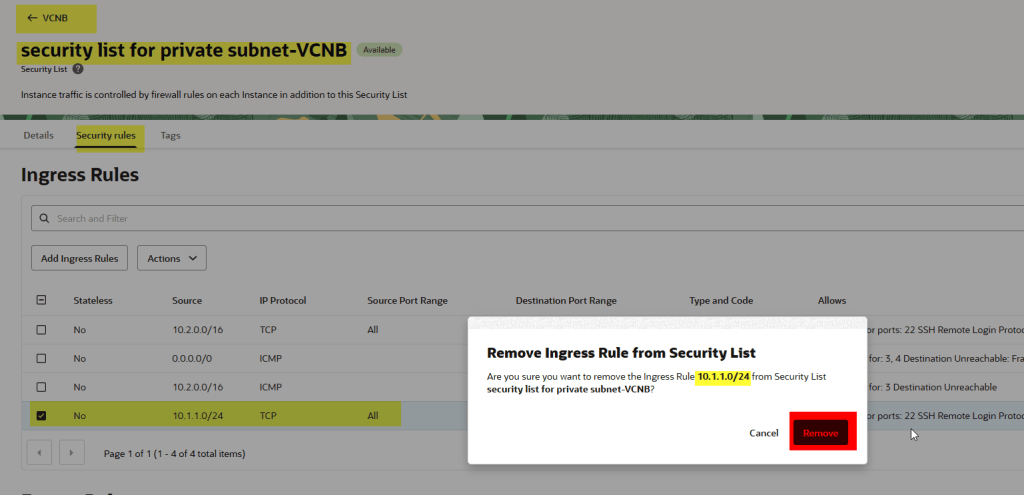
We didn’t remove the ingress rule in the security list on the private subnet in VCNA, but just in case let’s double check:
Test the connection
Now let’s try again. From InstanceA, connect to InstanceB… and it works! 🎉

Connection has been established successfully through ssh!
What about network security groups?
In many cases, you don’t want to manage rules at the subnet level. Instead, you can use NSGs for more granular control. Let’s demonstrate that too:
- Remove the security list ingress rule.
- Create a new NSG and add an ingress rule to allow traffic from
10.1.1.0/24. - Attach the NSG to InstanceB.
- Test again from InstanceA.
Remove the security list ingress rule.
Let’s try to connect

As you can see, I’m not able to connect from instanceA to InstanceB, let’s proceed with the creation of the NSG
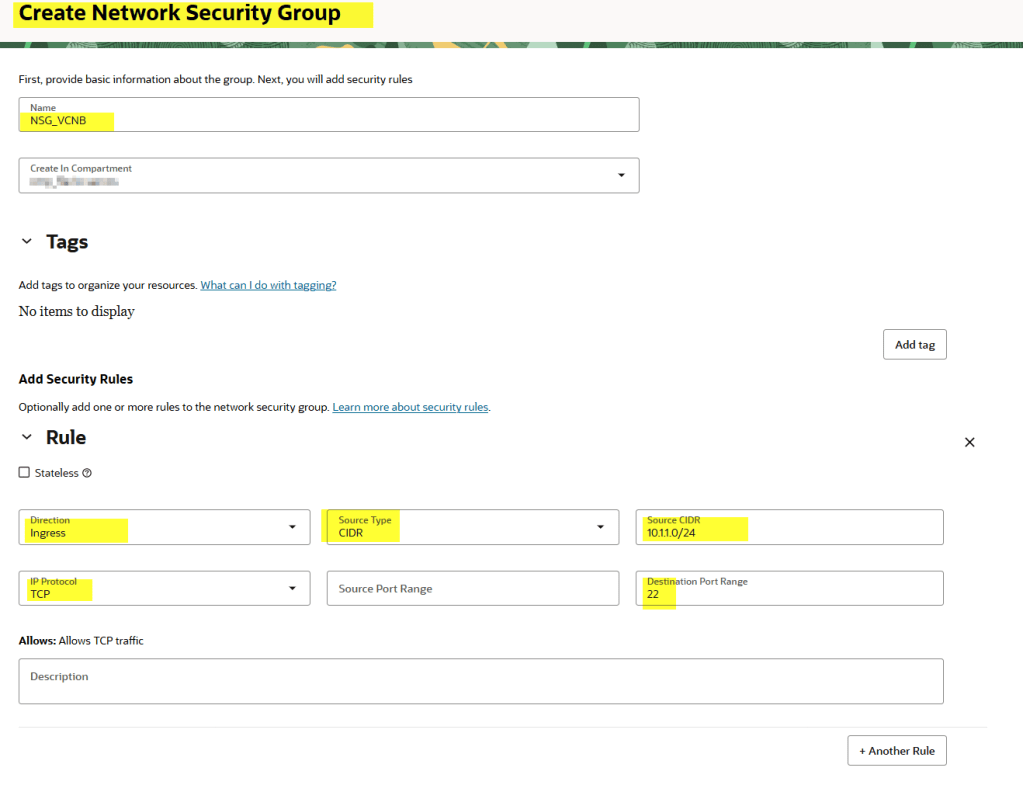
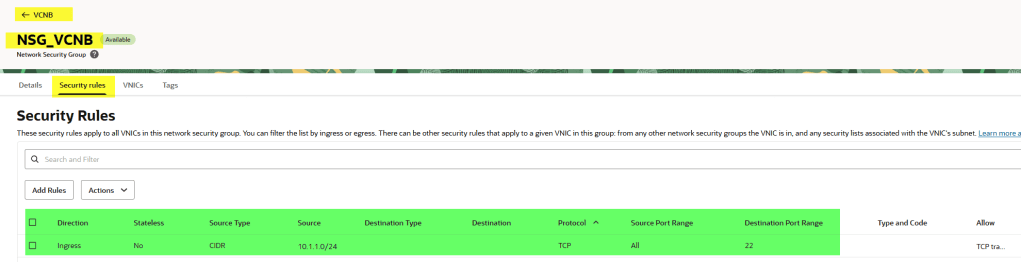
Create a NSG and add an ingress rule
Create a new NSG and add an ingress rule to allow traffic from 10.1.1.0/24.
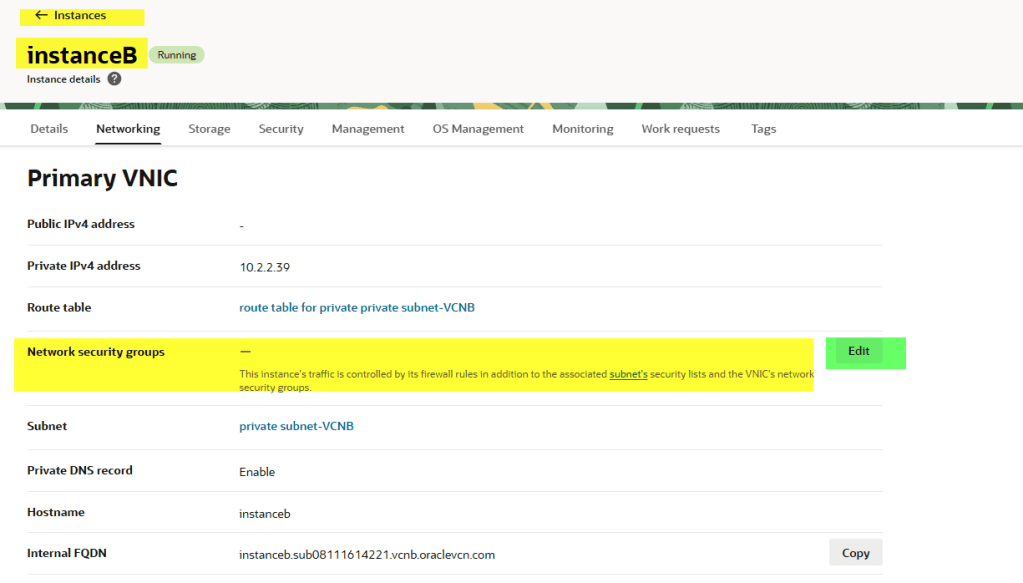
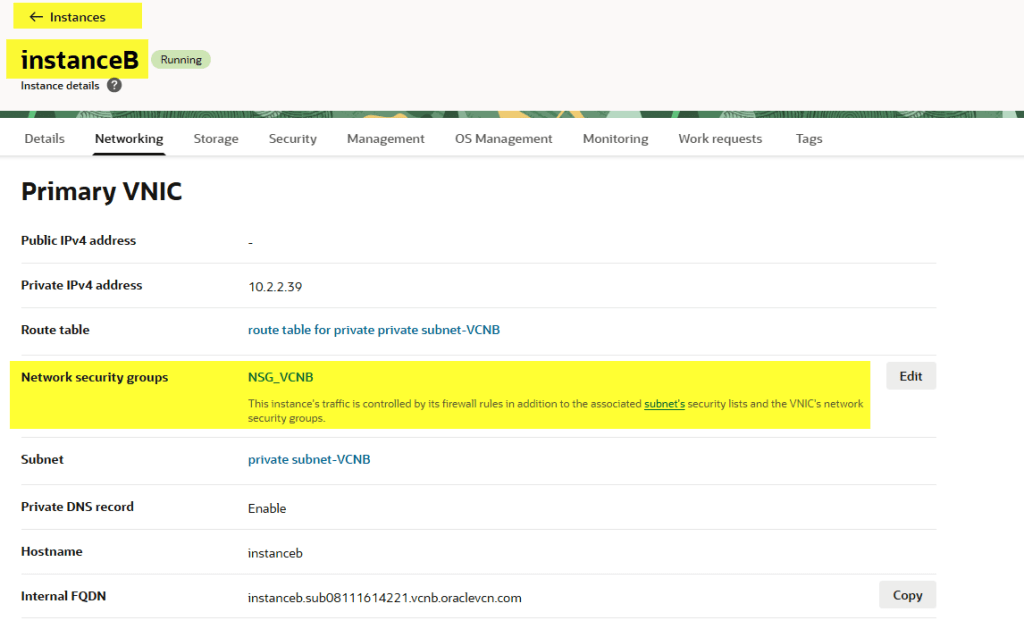
Finally, we need to attach this NSG to the instance, otherwise it won’t work
Attach the NSG to InstanceB.

Test again from InstanceA.
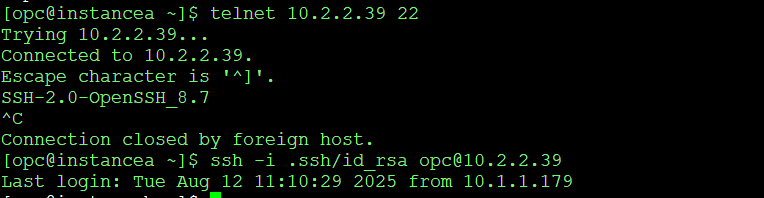
The SSH connection succeeds, confirming that NSGs can be used instead of subnet-level security lists.
Wrapping up
With local peering, routing, and security rules in place, the connection between VCNA and VCNB works seamlessly.
The key steps are:
- Create LPGs in both VCNs
- Establish the peering
- Update route tables
- Adjust security rules
For security, you can either use security lists at the subnet level or NSGs at the VNIC level. Just remember that if an NSG is attached to your instance, its rules will take precedence, and the security list will be ignored.
And that’s it! You now have a working OCI local peering setup.
That’s my take on local peering in OCI. What about you? Do you have tips, lessons learned, or even horror stories from setting it up? Drop a comment below and let’s compare notes.


Leave a reply to fsarcosdb Cancel reply