
I have this post pending for quite some time since the new version of Oracle GoldenGate was announced in September this year. You can read about the announcement here: Announcing availability of Oracle GoldenGate 23c Free
So, let’s get started!
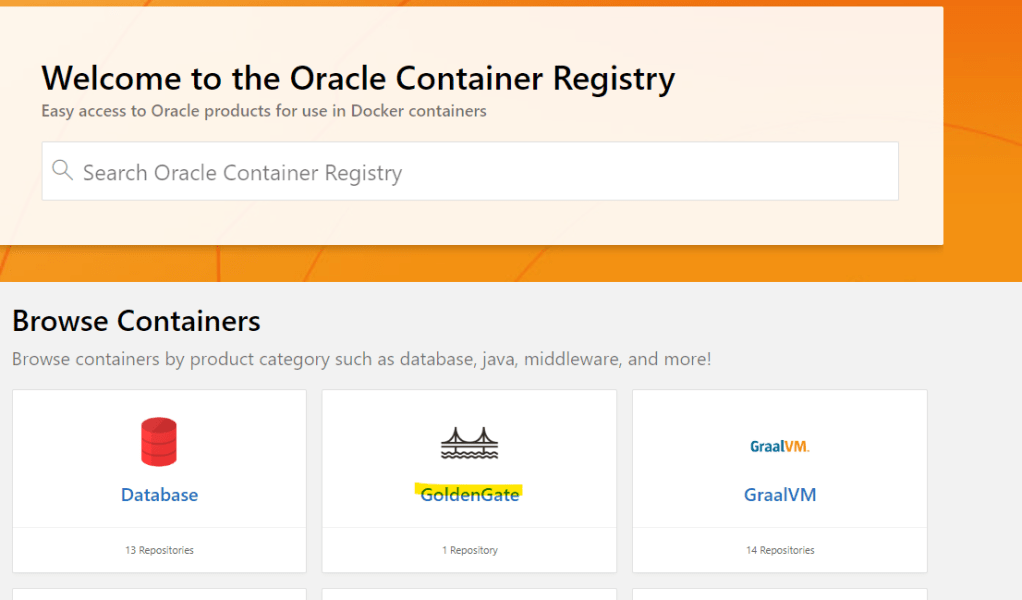
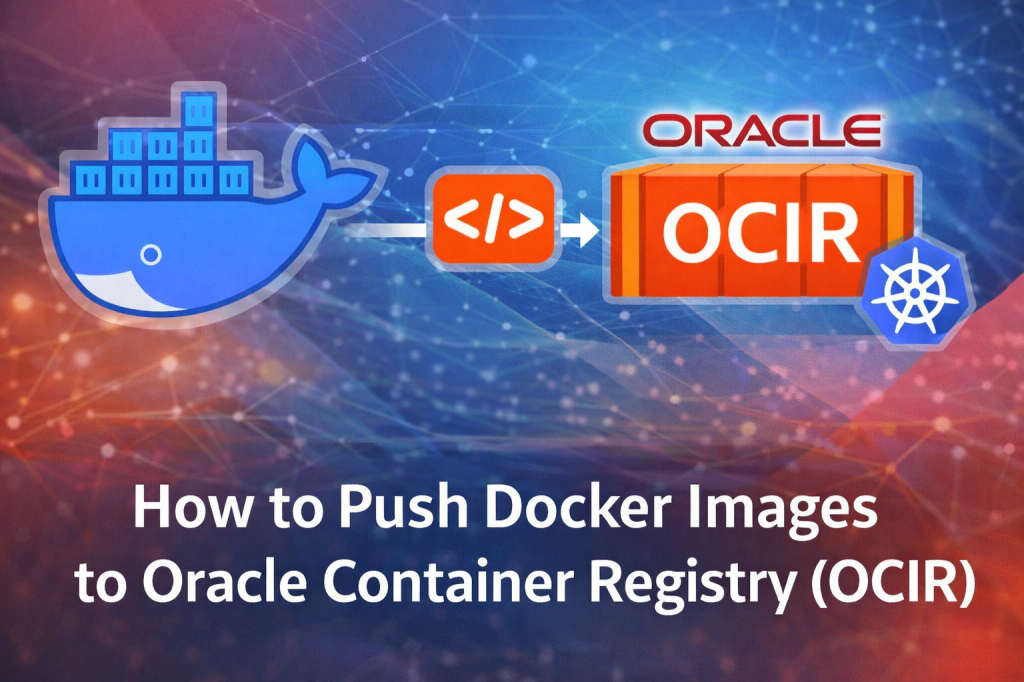
Download of Goldengate 23c Free image
For the purpose of this demo, I will use the Golgendate 23c Free image. I have found the image in the Oracle container registry: https://container-registry.oracle.com/
I have Docker installed in my virtual machine, to download the image we can use the docker pull command.
docker pull
container-registry.oracle.com/goldengate/goldengate-free:latest
Once you have downloaded the image you can list it running the docker image command:
docker images
Start and run Oracle GoldenGate Free
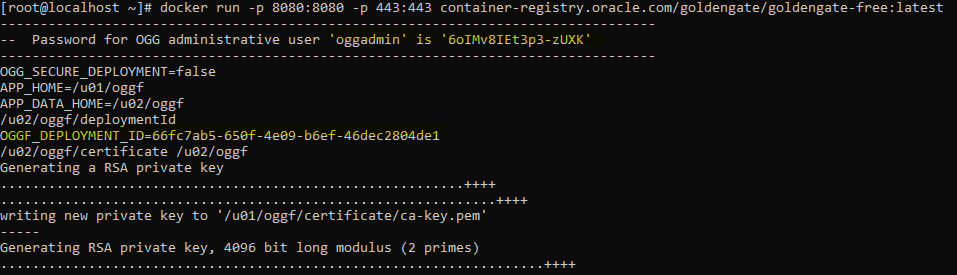
We can run the Docker container image using different parameters, but let’s use the basic ones:
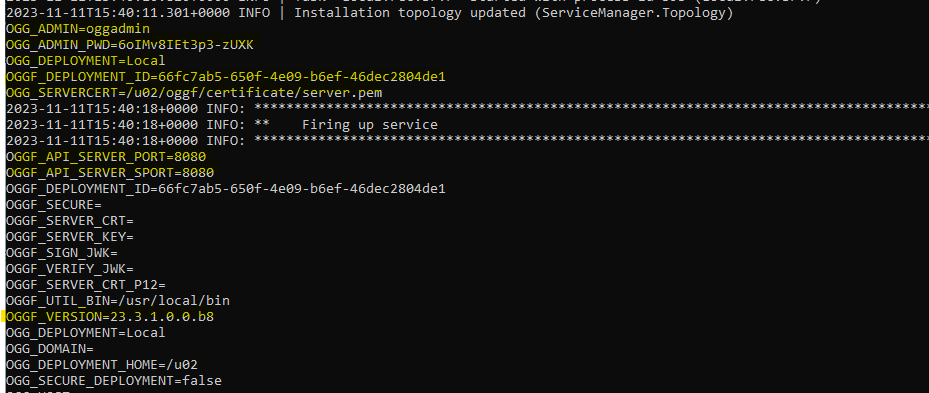
docker run -p 8080:8080 -p 443:443 container-registry.oracle.com/goldengate/goldengate-free:latestSee that few things are generated automatically:
- OGG_ADMIN and OGG_ADMIN_PASSWORD
- OGG_DEPLOYMENT NAME
- etc…
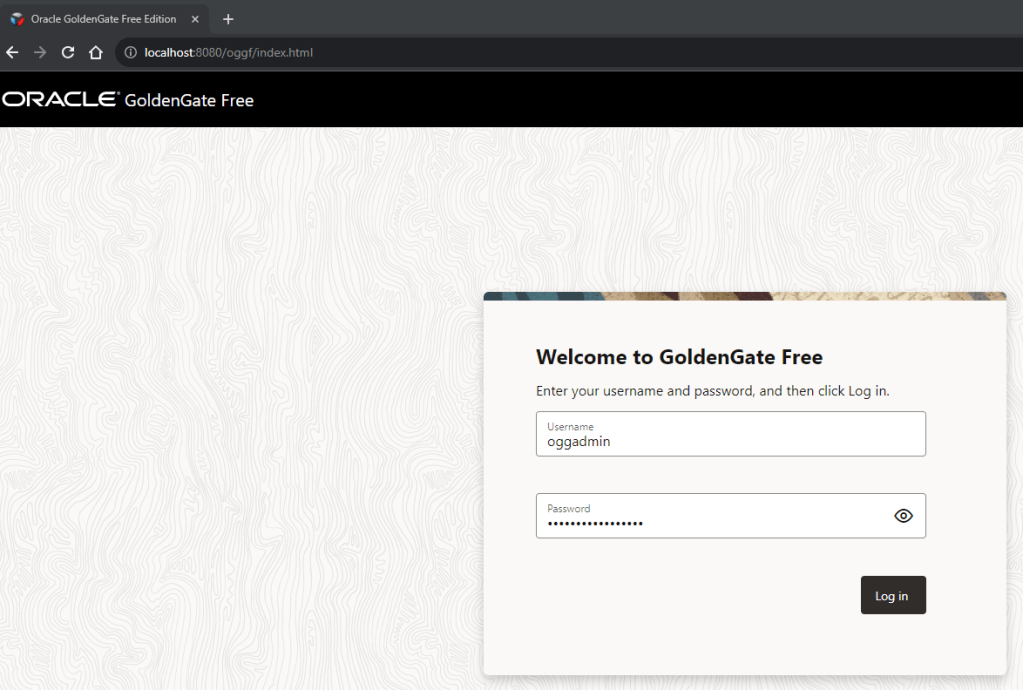
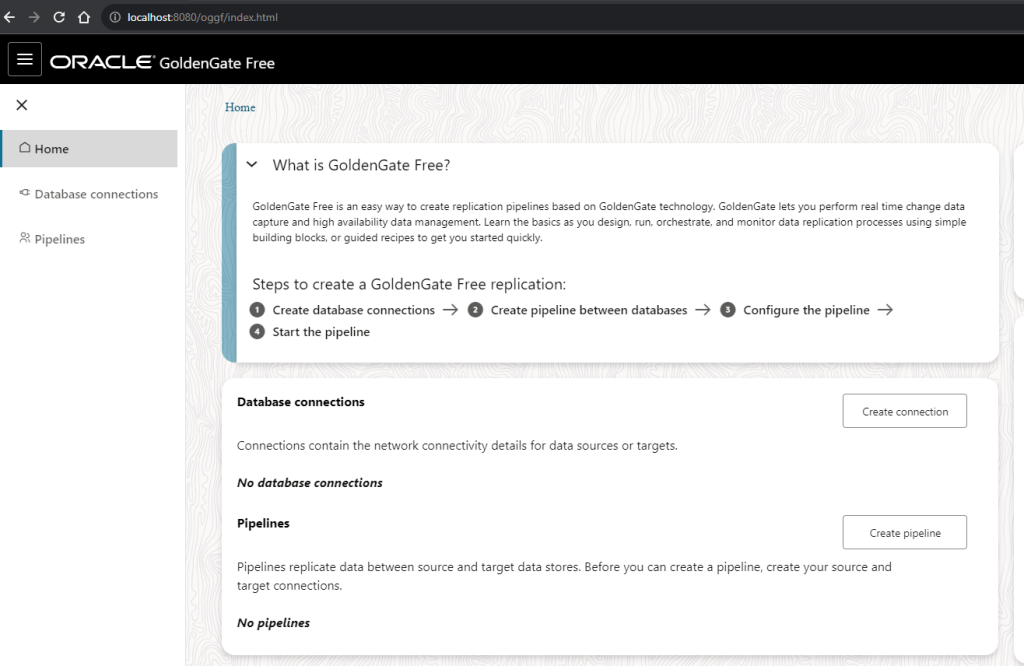
Let’s see if my deployment is ready to use, accessing through the URL.

Great!, as you can below my GG deployment is running. I will connect using the credentials that my Docker had generated when I ran the command
Great, I can see information and few options to start playing around:
Database Connections
So, before we can proceed we need to create connections to connect to our databases and start doing something, right?
For the purpose of this demo I will a 19c and a 23c database:
- Oracle 19c nonCDB database
- Oracle 23c with two PDBs:
- FREEPDB1
- DATABASEVERSE
I will create two database connections:
- Oracle19cNonCDB for my Oracle 19c non CDB
- DatabaseVerse23c for my Oracle 23c PDB
To create connections just click in the Create connection button:
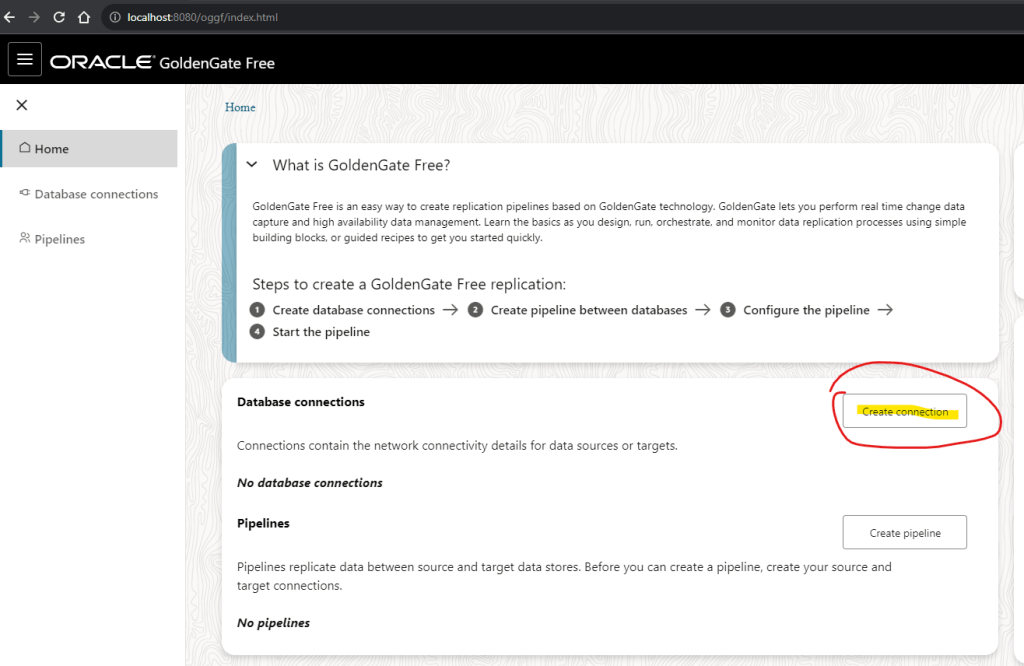
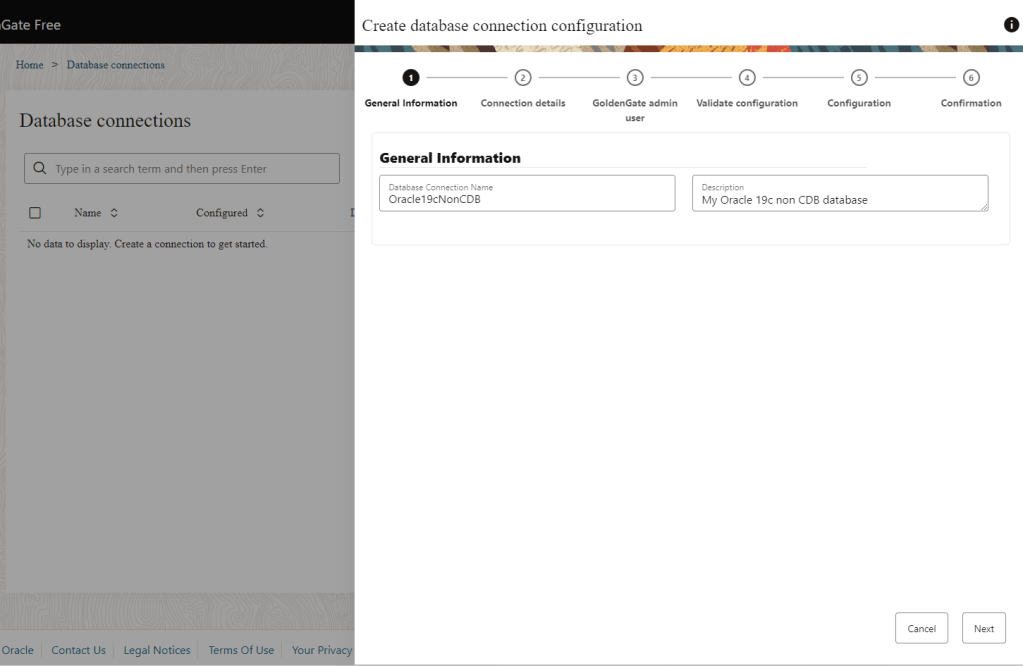
Provide the required details: hostname, port, credentials…
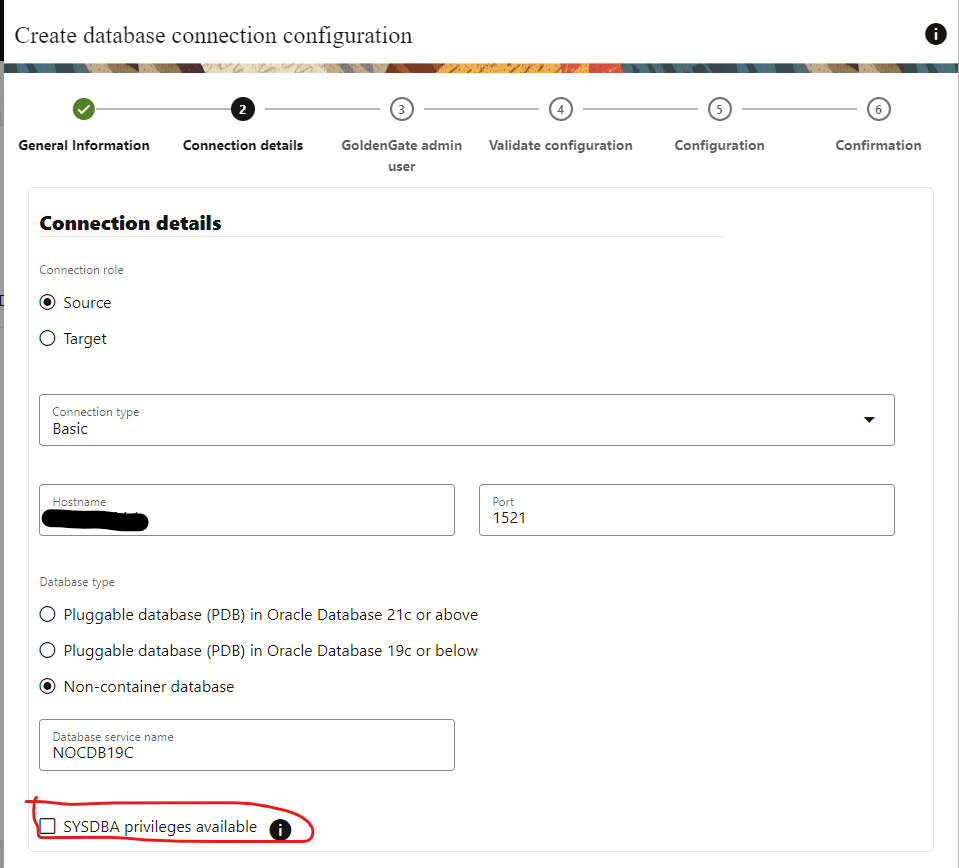
Select SYSDBA privileges available, you will need to use your user with SYSDBA credentials.
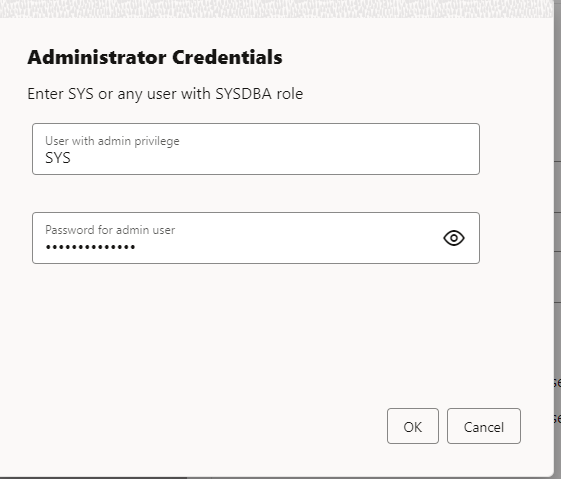
Finally click next.
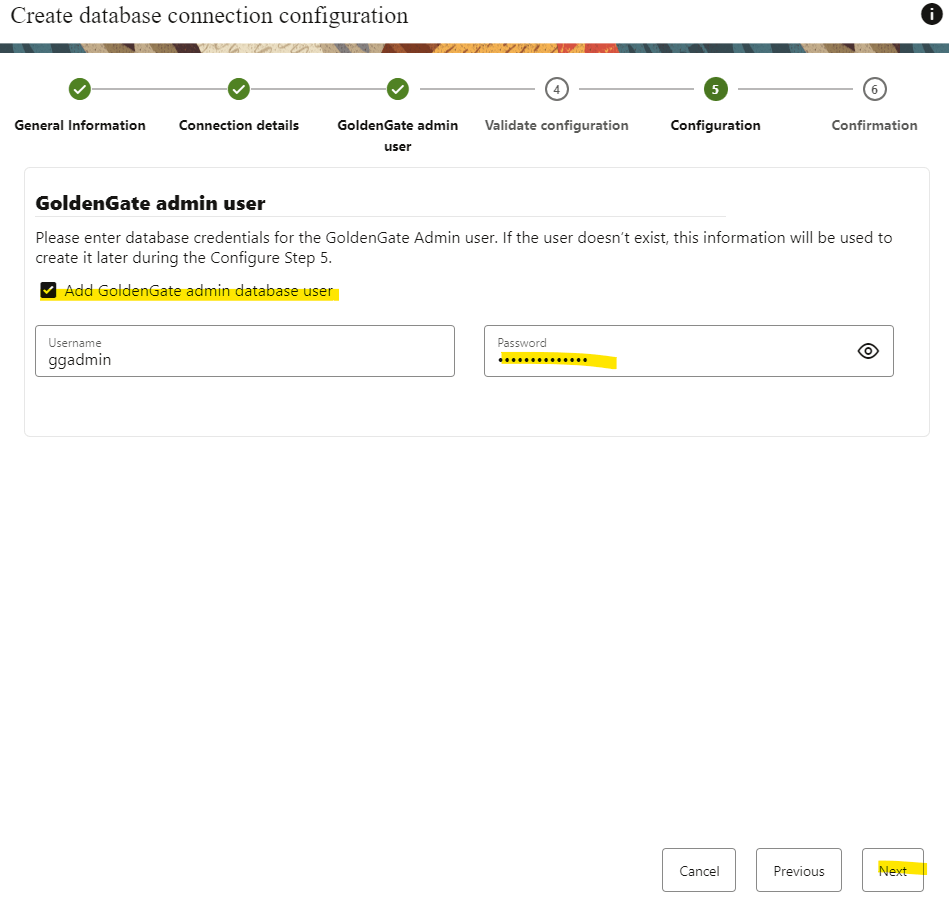
Then you will need to provide the ggadmin credentials. I don’t have a ggadmin user created, so it will be created with the password I will provide here.

Click next and run analysis in the following step:
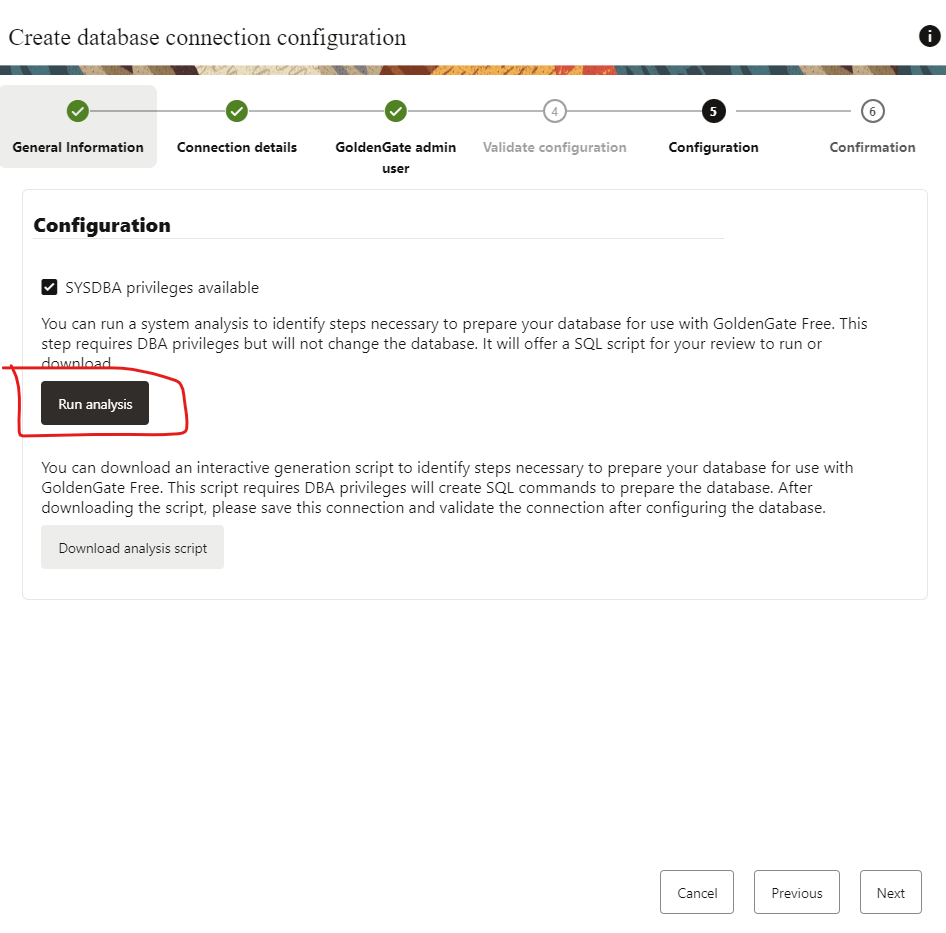
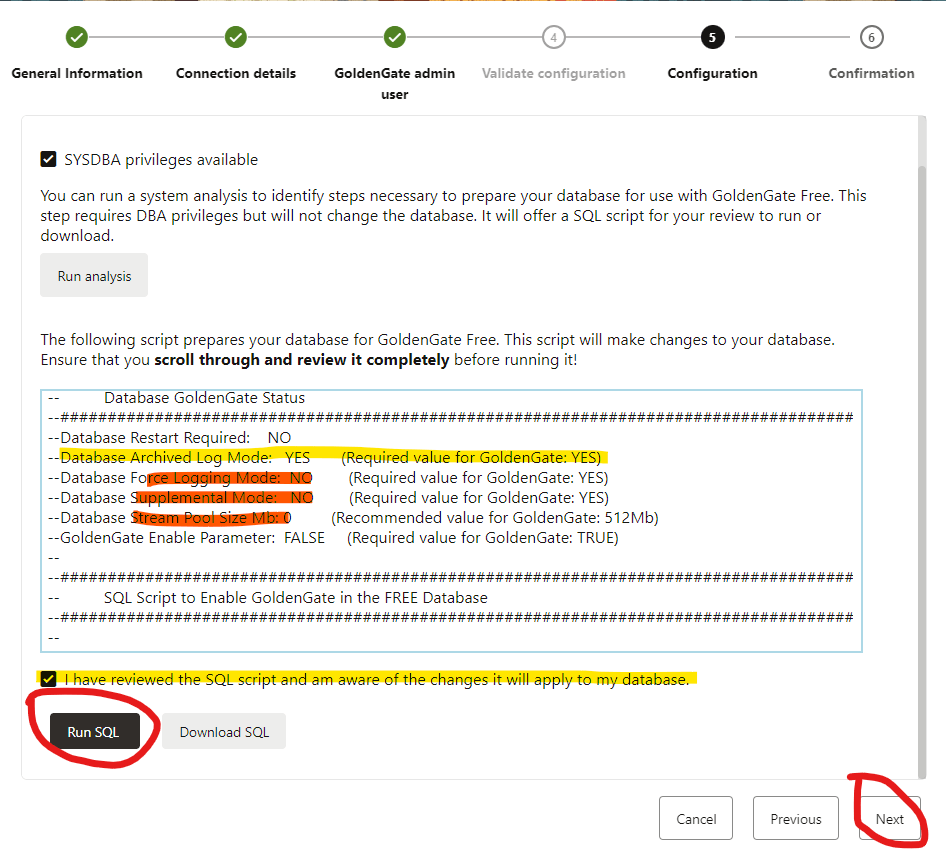
The run analysis task is a great tool as you can see what you need to set up and even provides you with recommendations:
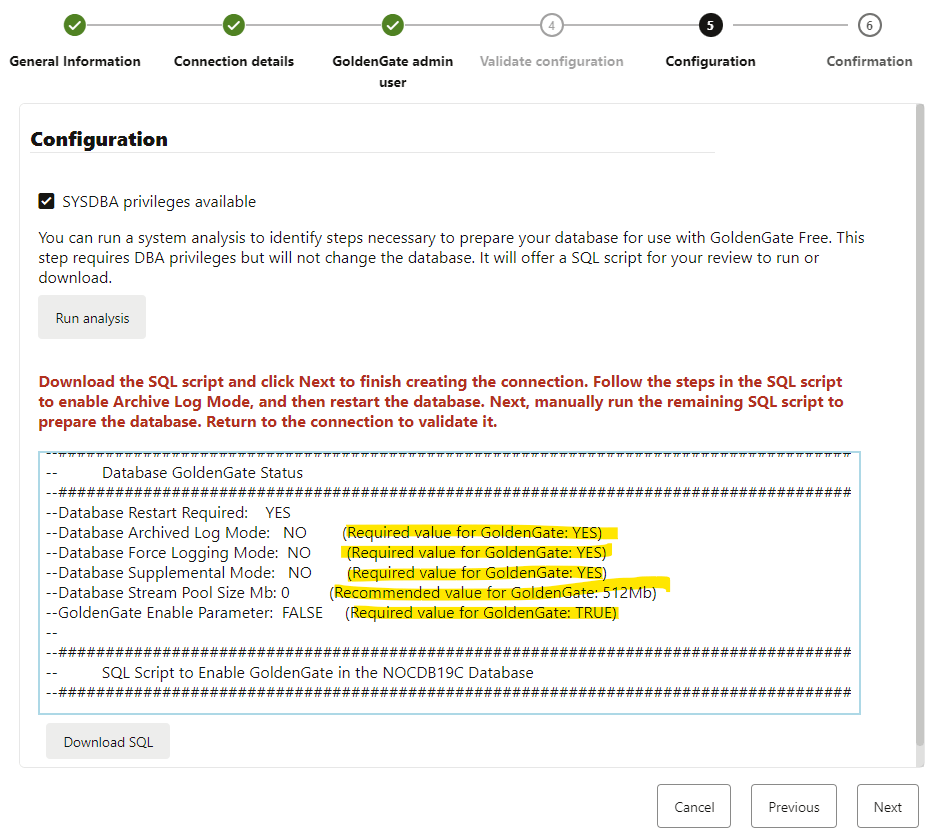
My current 19c database is running in noarchivelog. Also, force logging and supplemental mode are disabled, and this is essential for GG; otherwise, it won’t work.
All the required steps and recommendations are in the script provided by the tool. Let’s download it and apply it to my database:
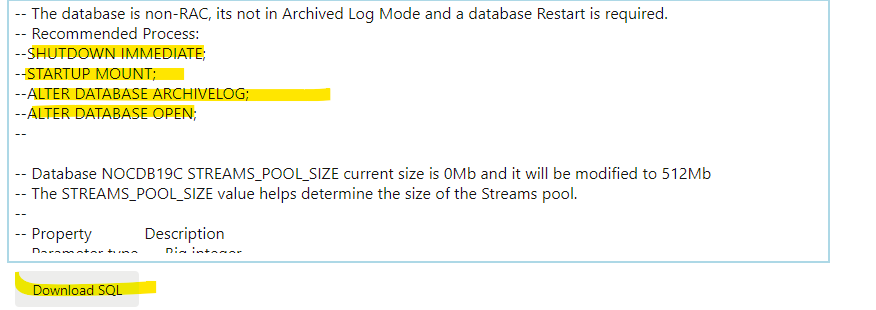
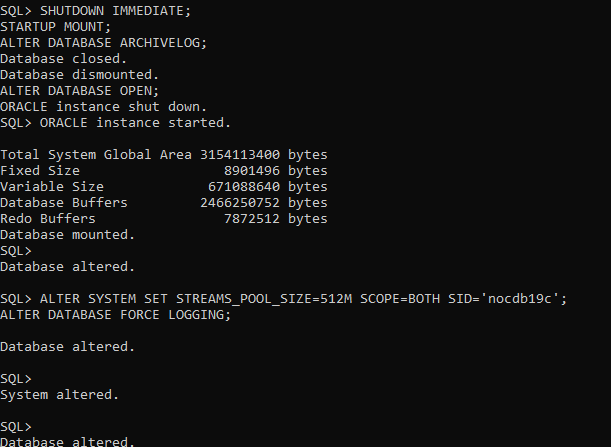
So, I have done the following steps manually only:
- Stop my database and start it in mount mode
- Enable archivelog mode and open my database
- Set STREAMS_POOL_SIZE to 512m as recommended by the tool
- Finally enabled FORCE LOGGING
Let’s run the analysis one more time and see the output.
Everything looks good. I recommend always reviewing the whole script so you are aware of what it is going to do in your database.
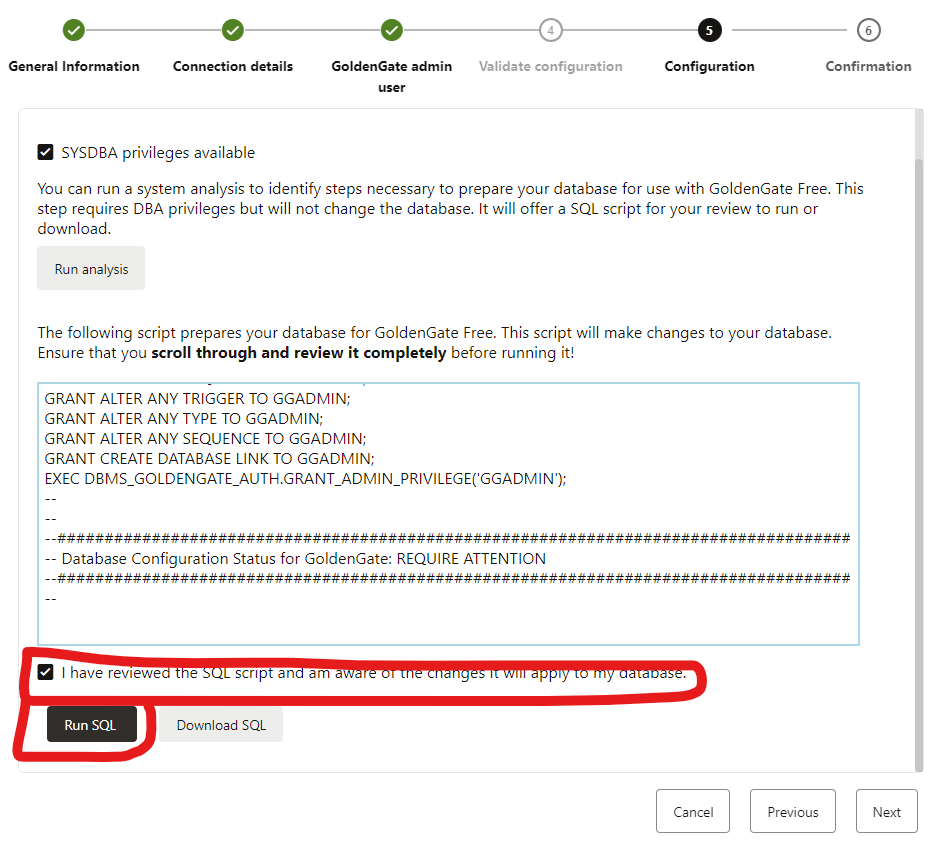
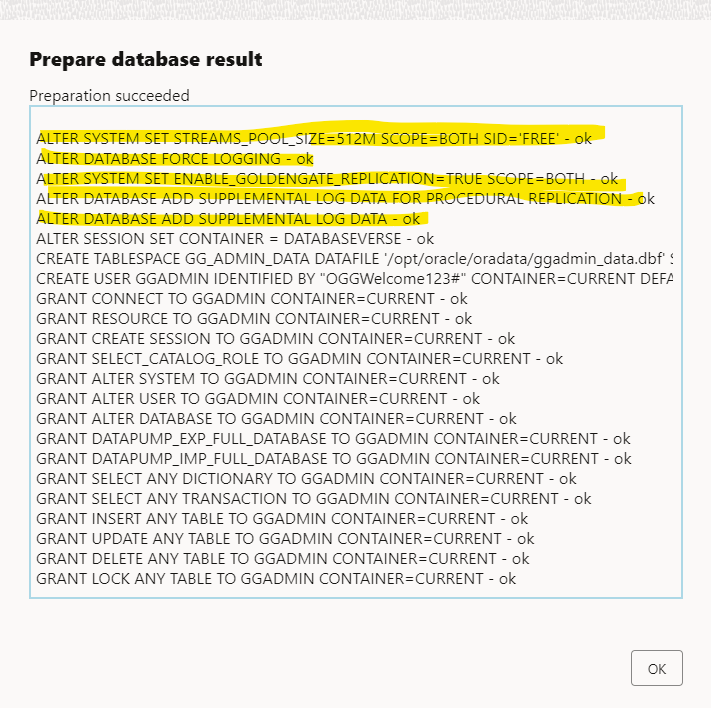
Once you are ok, mark the acknowledge check and finally click in RUN SQL.
Check the output:
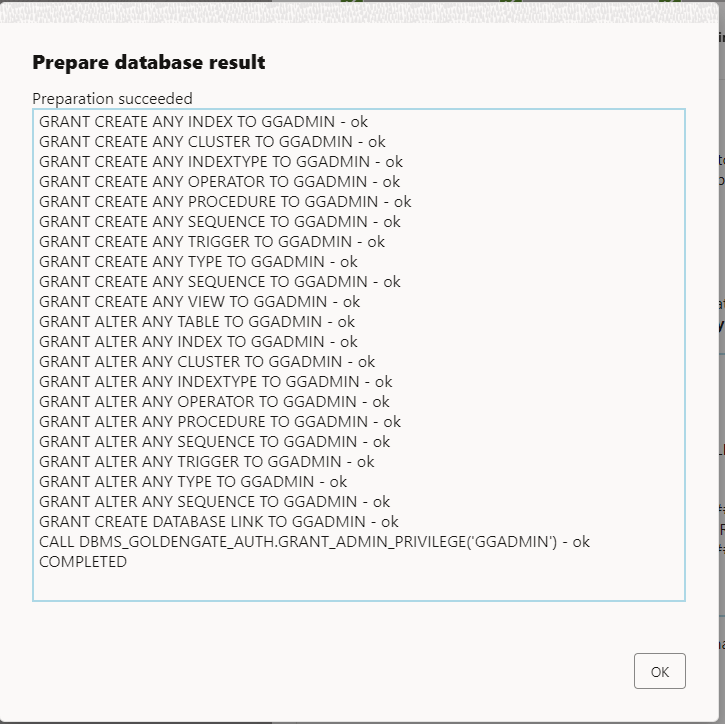
If looks good, click ok and the NEXT.
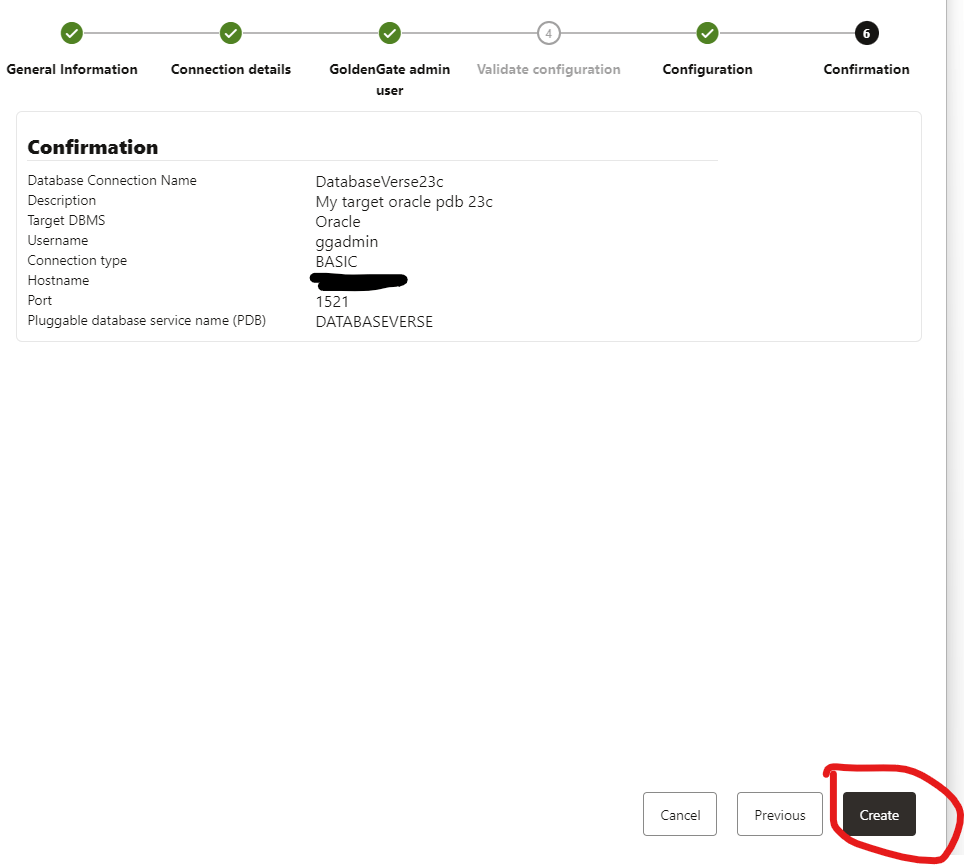
You will be in the last part that is the confirmation:
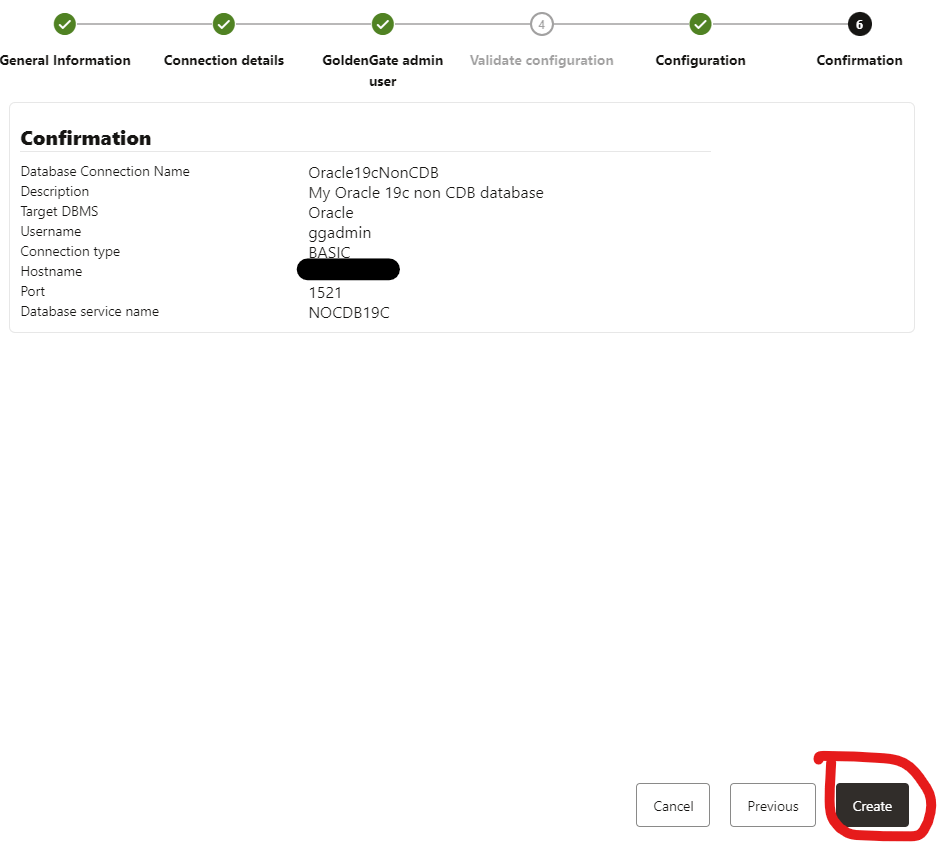
Again, validate that you are good and finally click in the CREATE button.
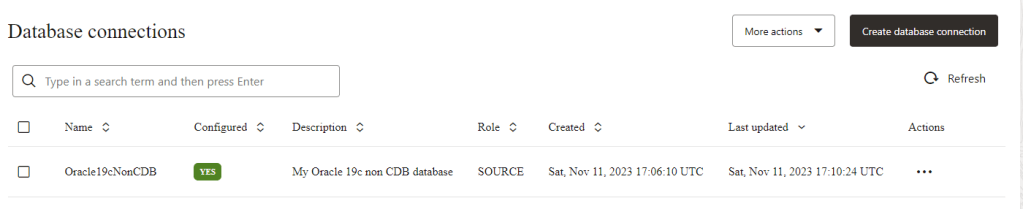
Great! Now you can see that your database connection is created and configured.
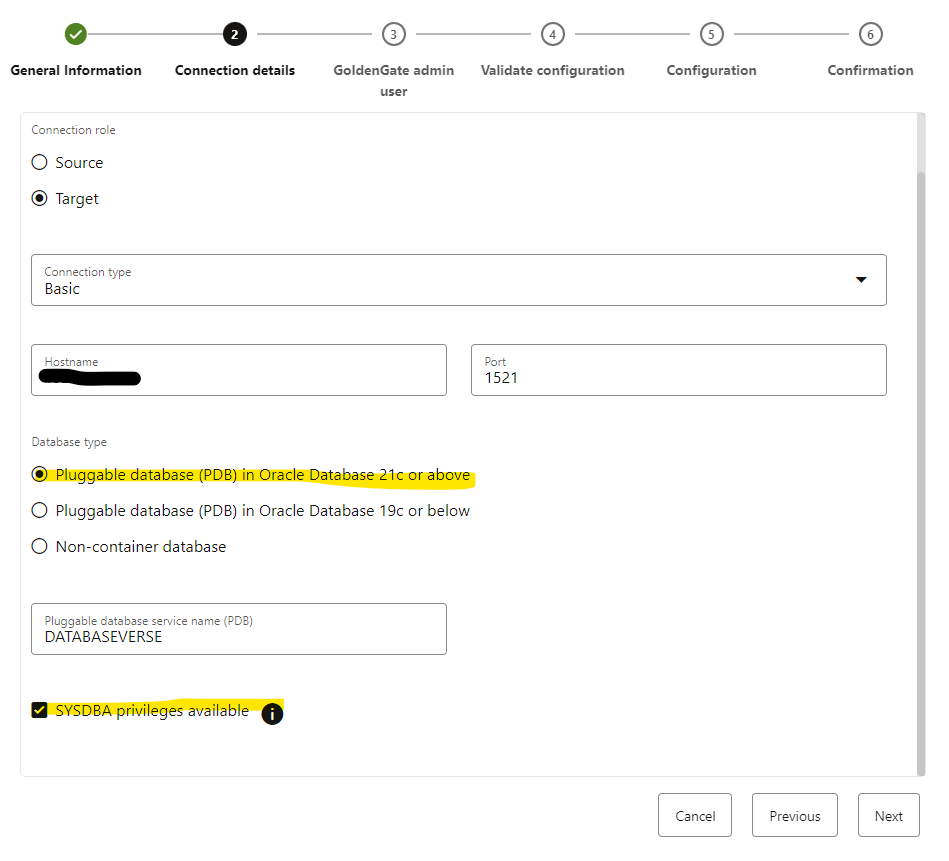
Let’s do same thing for our TARGET database.
Same thing, we need provide the connection details and credentials for our sysdba user and password, see that in this case I have selected “Pluggable database (PDB) in Oracle Database 21c or above”
Click NEXT and provide the ggadmin credentials. In my case, I haven’t set up the account manually, so the user will be created with the credentials I have provided.
In the next window, I ran the analysis and for my target database, I didn’t have to enable the archive log as it is already running in archive log mode.
However, force logging and supplemental mode are disabled, and other parameters like the recommended value for STREAM POOL SIZE are not set yet.
Since those changes do not require a restart, I will proceed by acknowledging that I have reviewed the SQL Script and then click on the Run SQL button.
Changes has been made successfully, click OK and then NEXT
Finally, let’s create the database connection:
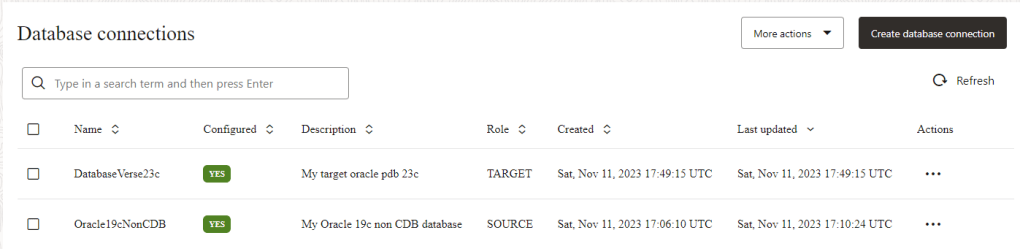
great, I have my SOURCE and TARGET database connection created:
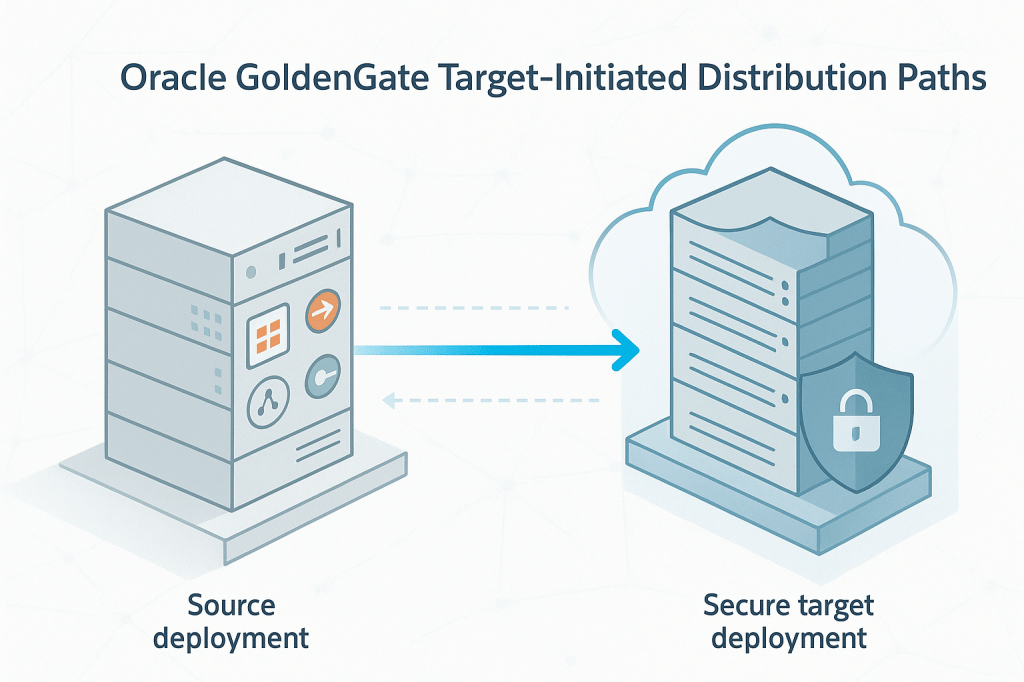
Create a One-way Database Replication
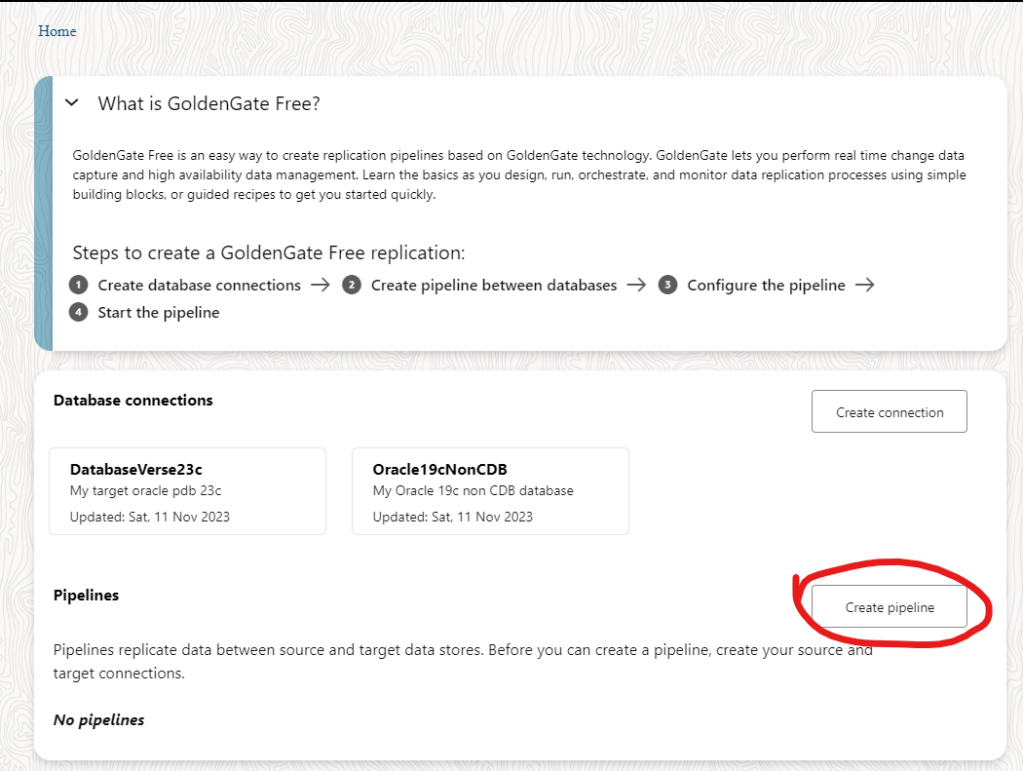
My connections are created so we can now create a pipeline.
In the home screen click in the Create pipeline button:
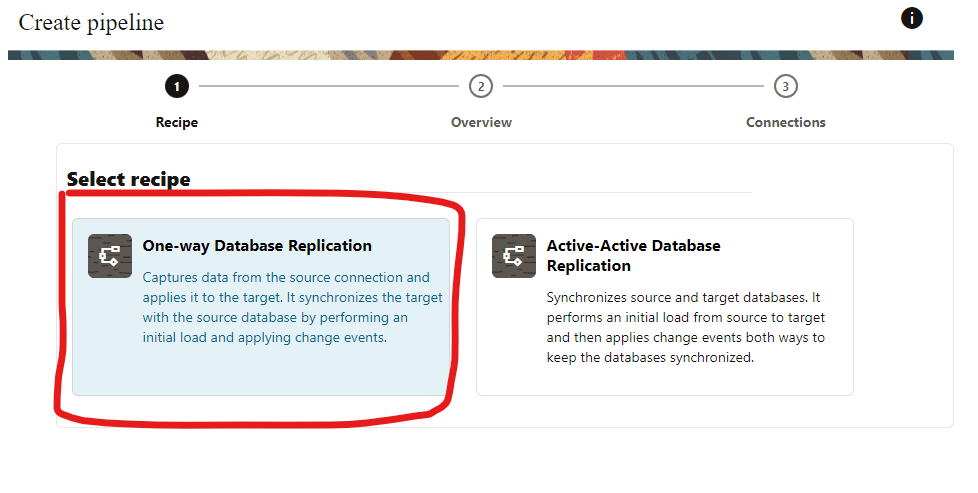
For the purpose of this demo I will setup One-Way Database replication:
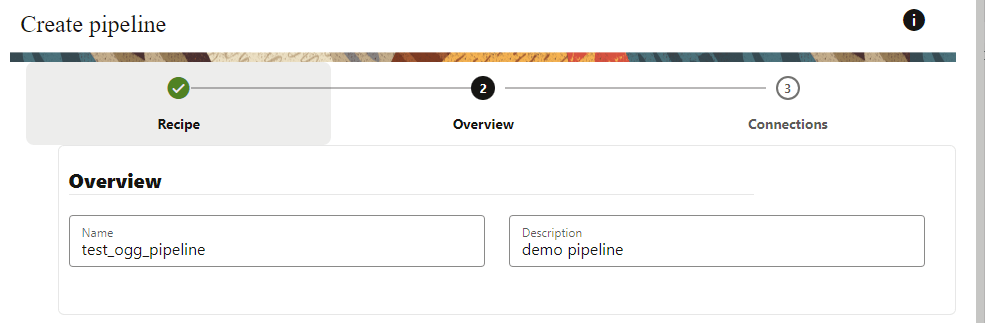
Enter a name for your pipeline:
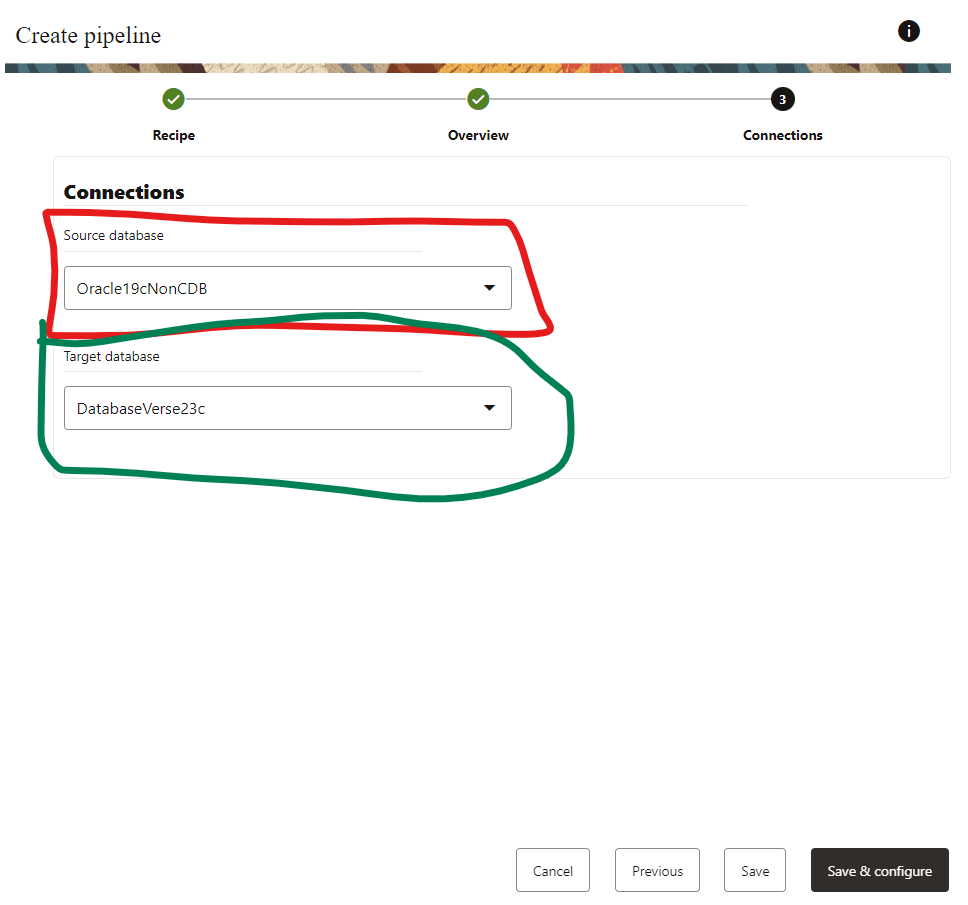
Select your SOURCE and TARGET database connections:
Before proceeding, let’s create an sample schema:
On my SOURCE 19c non CDB database:
create tablespace demogg datafile '/opt/oracle/oradata/NOCDB19C/demogg.dbf' size 128m autoextend off;
create user demoggsrc identified by Welcome123 default tablespace demogg;
grant connect, create session to demoggsrc;
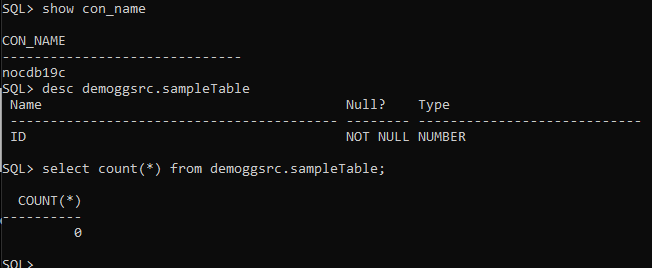
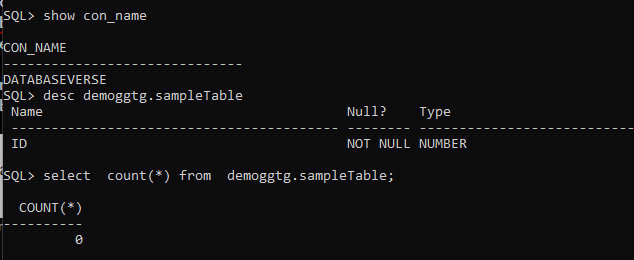
create table demoggsrc.sampleTable (id number primary key);On my TARGET DatabaseVerse PDB 23c:
create tablespace demogg datafile '/opt/oracle/oradata/FREE/08DD6CBD706B0DFDE065000000000001/datafile/demogg.dbf' size 128m autoextend off;
create user demoggtg identified by Welcome123 default tablespace demogg;
grant connect, create session to demoggtg;
create table demoggtg.sampleTable (id number primary key);
Both tables are empty in my SOURCE and TARGET:
Ok, great! Let’s see the mapping details:
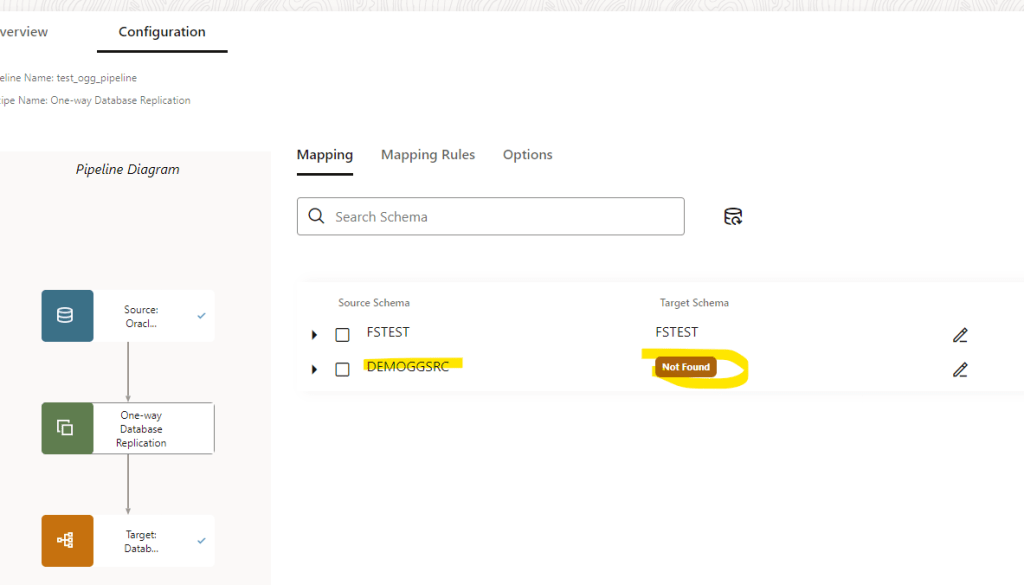
As my source schema and target has different name: demoggsrc != demoggtg the mapping is not able to match them by name. I did it on purpose so you can see that we can edit this.
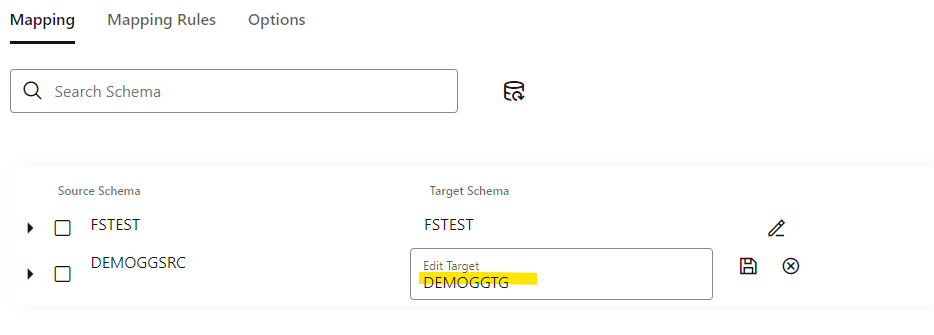
Let’s modify the mapping manually, click in the EDIT button and modify the name:
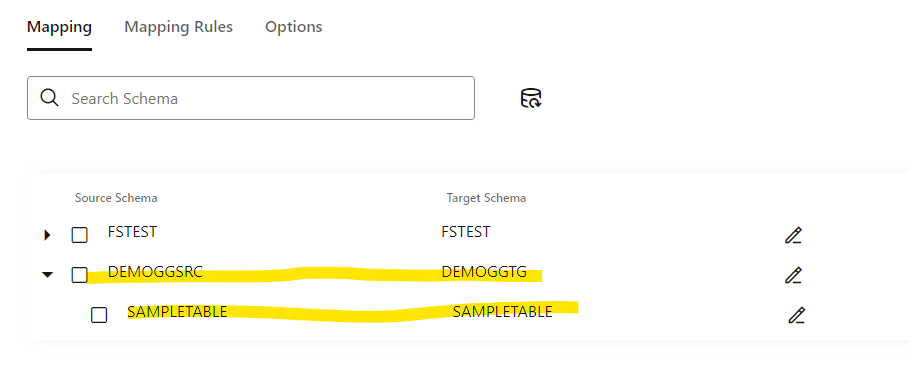
You can click and see that table match:
Click in Mapping Rules:
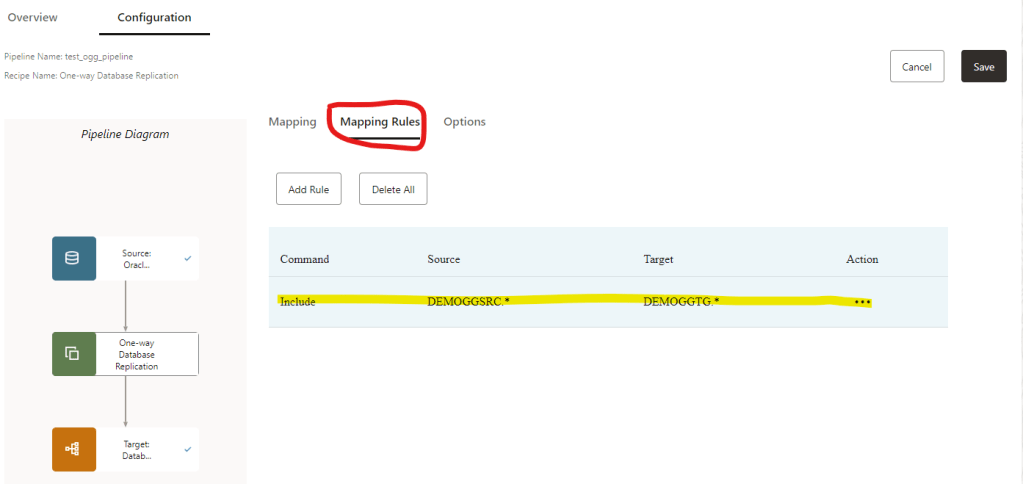
What you see here is the default option, basically we are telling that all the objects for DEMOGGSRC.* will be replicate to the target schema DEMOGGTG.*
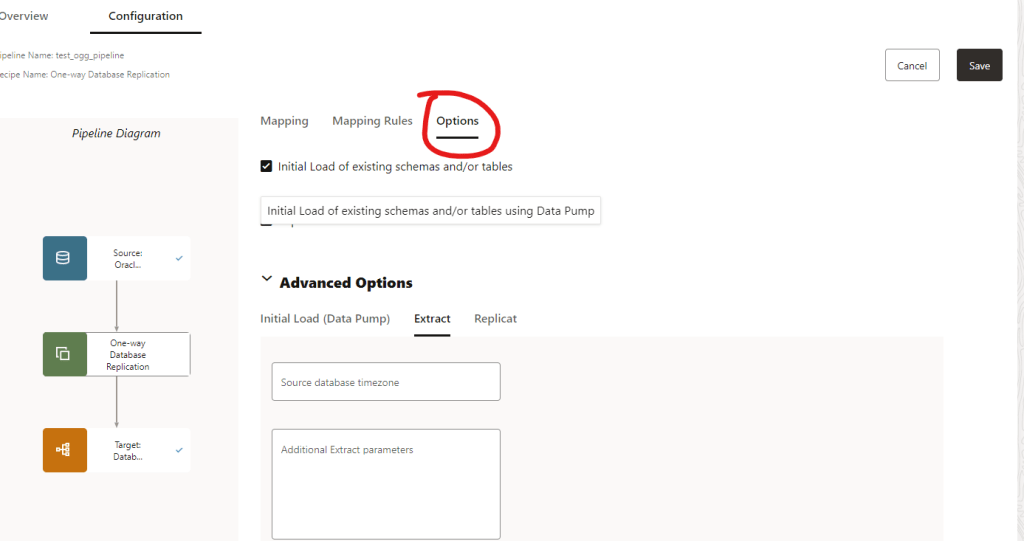
Now, click in Options
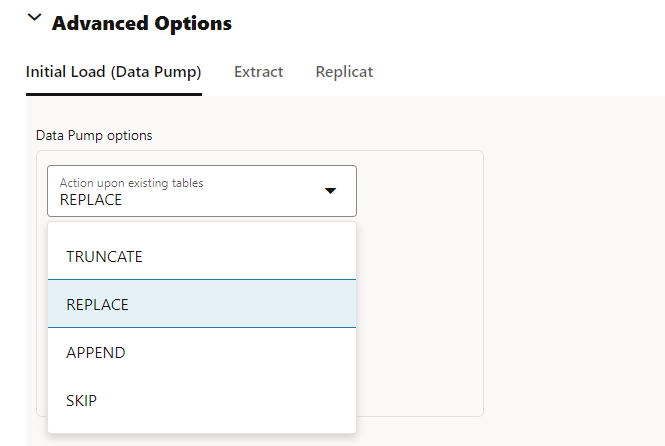
In the Advanced Options we can do a initial Load using Data Pump and specify actions as well, if the table exists in the TARGET we can replace it, append the data, truncate the data before importing or skip it.
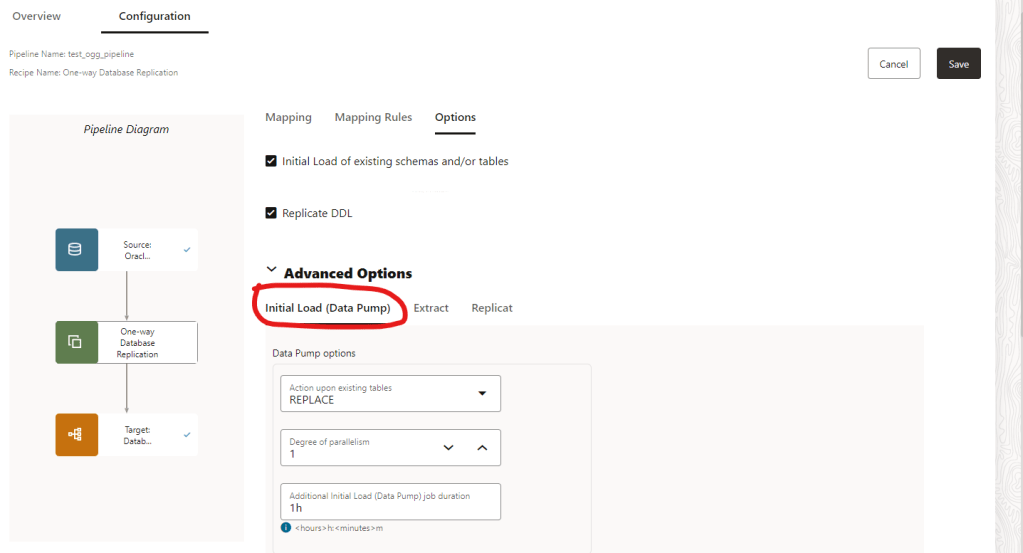
You can define a degree of parallelism as well
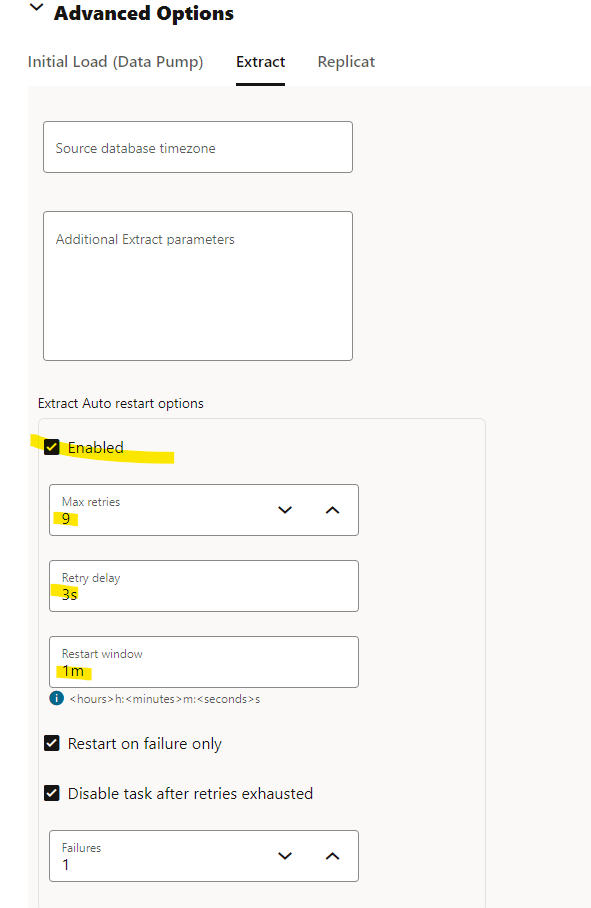
In the Extract options you can enabled auto restart for the extract and add retries:
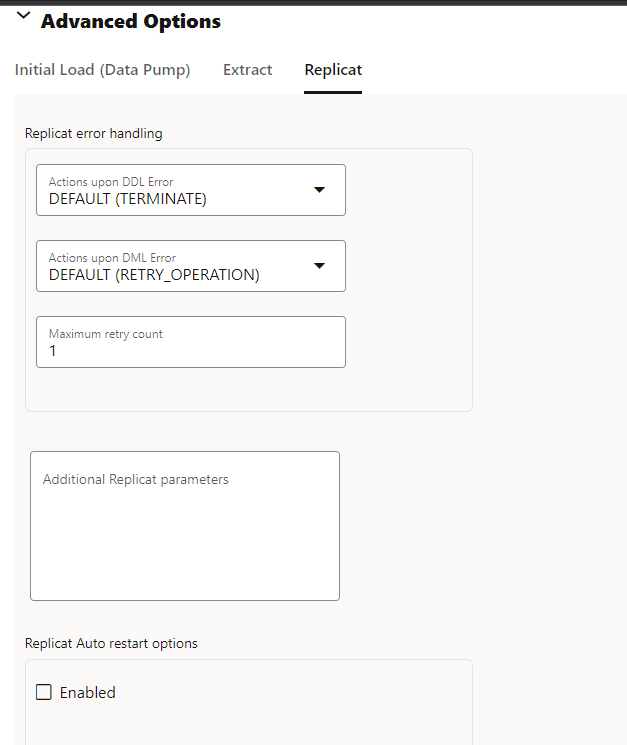
Finally, for Replicat you can set options as well about DDL issues and what to do:
Let’s save as it and see next options.
So, this is my pipeline, as you can see it haven’t started automatically. Let’s click in the start button and see the outcome:
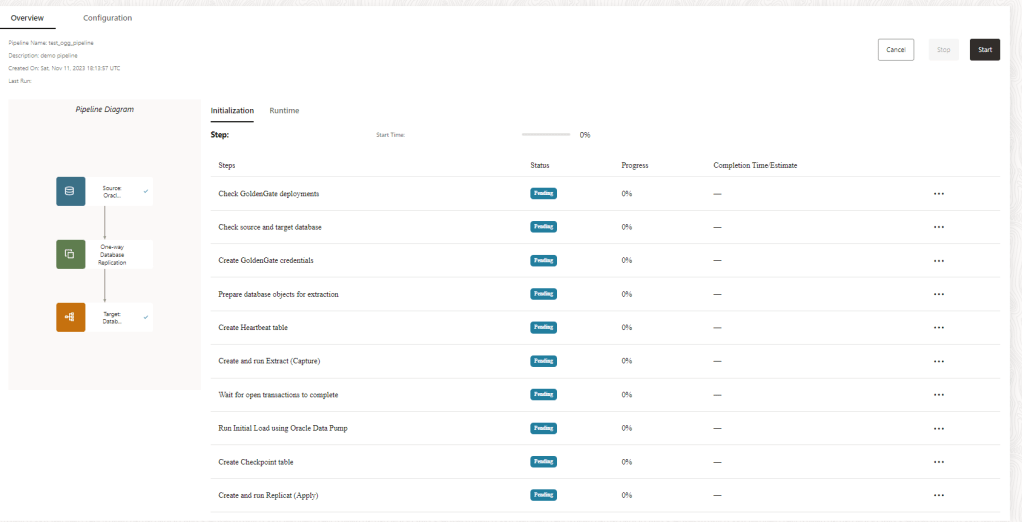
Pipeline does some checking in the SOURCE and TARGET once is done you will have runtime information available:
Let’s perform some insert operations in our SOURCE 19c non CDB database:
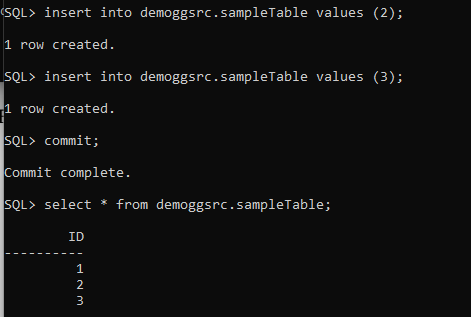
Let’s see my PDB target database:
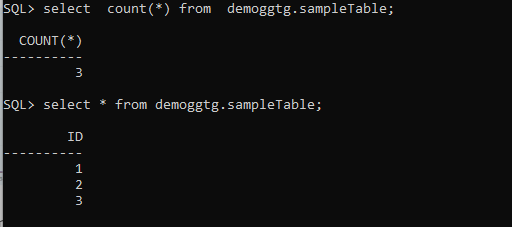
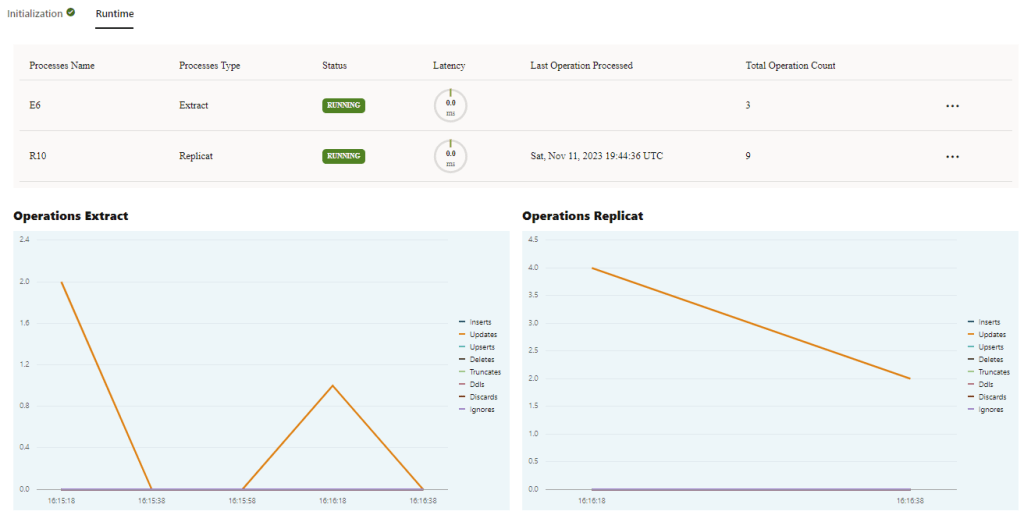
The data has been replicated successfully, let’s check the GG run time:
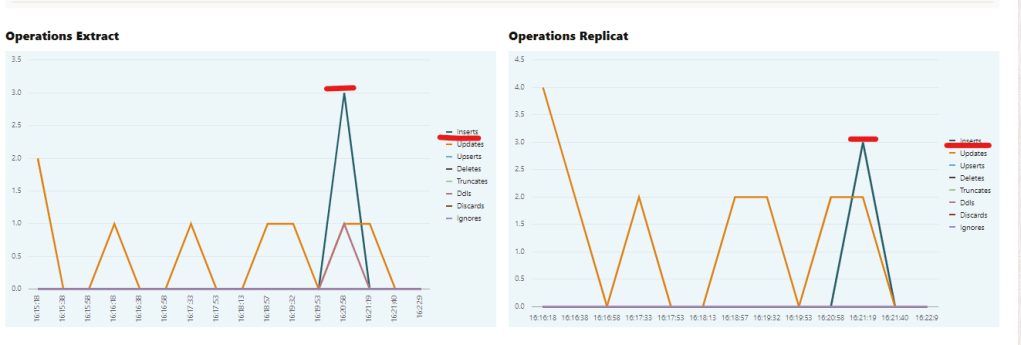
If we take a closer look, we can see that 3 insert operations were captured from the SOURCE, and then Replicat performed the same 3 operations in the TARGET.
So my pipeline is working fine, nice!
This is, of course, a very basic demo, but as you can see, Golden Gate has changed a lot now.
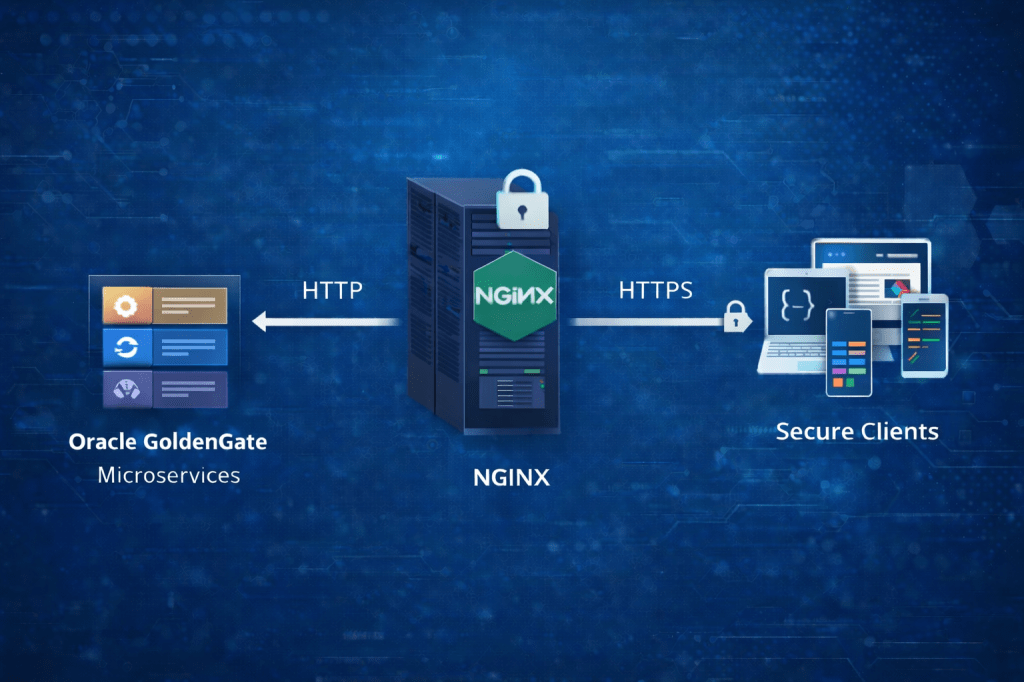
The new Microservice Architecture (MA) introduced in Oracle GoldenGate allows an easier management and configuration of data replication.
I hope you have found this demo useful!

Leave a comment