
Hi guys,
As you probably already know, Oracle announced months ago that Oracle Database is compatible with ARM architecture. In fact, they mentioned Oracle 19C as the first version compatible with Ampere processors. And if you don’t know, you can provision VMs with ARM processors FOR FREE in OCI, with a maximum of 4 OCPUs and 24GB of memory. Isn’t that awesome?
I have to clarify that, as it is free, sometimes it can be quite difficult to get a VM with ARM in a region, so try and try again… until you finally succeed.
So, let’s install and create an Oracle Database 19c on a VM with ARM processors!
I have created a VM for this purpose with 12GB of RAM and just 2 OCPU, bellow you can check that it said aarch64:

great, let’s install the oracle prerequisites packages in the operation system, btw this is Oracle Linux Red Hat 8.8.
sudo dnf update -y
sudo dnf -y install -y oracle-database-preinstall-19c
Once prerequisite packages are installed, let’s check if oracle users and groups were created:

As you can see above, oracle user and groups: oinstall, dba, oper, backupdba, dgdba, kmdba and racdba were created.
Now, we have almost everything on place, let’s download the database software, I have downloaded the software from the following official URL: Database Software Downloads | Oracle

Click and accept the Oracle License Agreement, you should have an account.

You can download the software locally and then upload it to the VM using a sftp client: winscp, filezilla or any other of your preference.
In my case, I initiated the download but instead of waiting for the completion on my local machine, I obtained the download link and used it with a wget command to download the software directly in the VM.
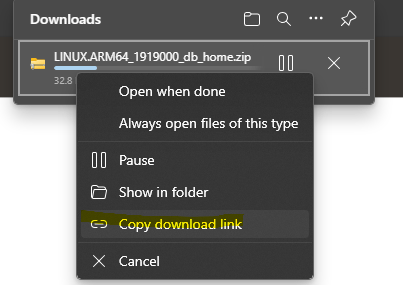
This is the command example I have used:
wget https://download.oracle.com/otn/linux/oracle19c/1919000/LINUX.ARM64_1919000_db_home.zip?AuthParam=1695221631_bb649c160b336fa256a597f24019598d -O LINUX.ARM64_1919000_db_home.zip
I have the software downloaded, great!
Ok, now with the user opc (using sudo) I will create some folders for the purpose of installing the software and where my database datafiles will reside.
sudo mkdir -p /u01/app/oracle/product/19.0.0 /u01/oradata /u01/fast_recovery_area /u01/app/oracle/product
sudo chown -R oracle:dba /u01
good, I have my folders created and also oracle user onw them.
Database Software installation
Ok, let’s unzip the software zip file now with oracle user:
sudo su - oracle
unzip -d /u01/app/oracle/product/19.0.0 LINUX.ARM64_1919000_db_home.zip
To make it easier for me, I will create a response file so I can refer to the file to install the software.
cat > db_install_19c.rsp << EOF
oracle.install.responseFileVersion=/oracle/install/rspfmt_dbinstall_response_schema_v19.0.0
oracle.install.option=INSTALL_DB_SWONLY
UNIX_GROUP_NAME=oinstall
INVENTORY_LOCATION=/u01/app/oraInventory
ORACLE_BASE=/u01/app/oracle
ORACLE_HOME=/u01/app/oracle/product/19.0.0
oracle.install.db.InstallEdition=EE
oracle.install.db.OSDBA_GROUP=dba
oracle.install.db.OSOPER_GROUP=oper
oracle.install.db.OSBACKUPDBA_GROUP=backupdba
oracle.install.db.OSDGDBA_GROUP=dgdba
oracle.install.db.OSKMDBA_GROUP=kmdba
oracle.install.db.OSRACDBA_GROUP=dba
EOF
Now, let’s run the installer using the response file:
/u01/app/oracle/product/19.0.0/runInstaller -silent -responseFile /home/oracle/db_install_19c.rsp 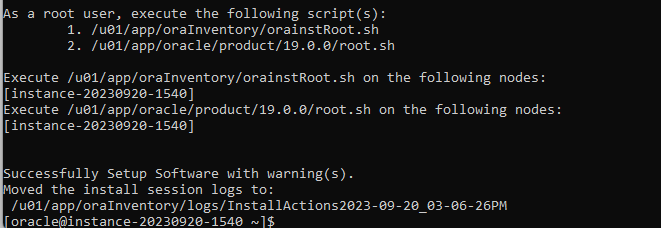
Installation was completed!, warning messages in this case can be ignored as installation is good (I have checked it =D )
As you can see in the screenshot above, it mentions to execute some scripts with the root user to complete the installation properly. Let’s do that.
/u01/app/oraInventory/orainstRoot.sh
/u01/app/oracle/product/19.0.0/root.sh
Good!, everything is done, software installation is completed and I can proceed to create the database now.
Create a database
I will do the same as I did for the installation of the software; I will create a response file so that I can use it later to create the database.
cat > db_creation_19.rsp << EOF
gdbName=CDB19C
sid=CDB19C
databaseConfigType=
createAsContainerDatabase=true
numberOfPDBs=1
pdbName=PDB1
pdbAdminPassword=Welcome123#
templateName=General_Purpose.dbc
sysPassword=Welcome123#
systemPassword=Welcome123#
datafileDestination=/u01/oradata
recoveryAreaDestination=/u01/fast_recovery_area
storageType=FS
initParams="db_unique_name=CDB19C,shared_pool_size=1024M,java_pool_size=200M"
sampleSchema=true
databaseType=OLTP
totalMemory=4096
EOF
Now that I have the response file, the next step is to use the dbca utility tool to create the database. I will do this using the -silent flag as I don’t want to use de UI interface.
/u01/app/oracle/product/19.0.0/bin/dbca -createDatabase -responseFile /home/oracle/db_creation_19.rsp -silent
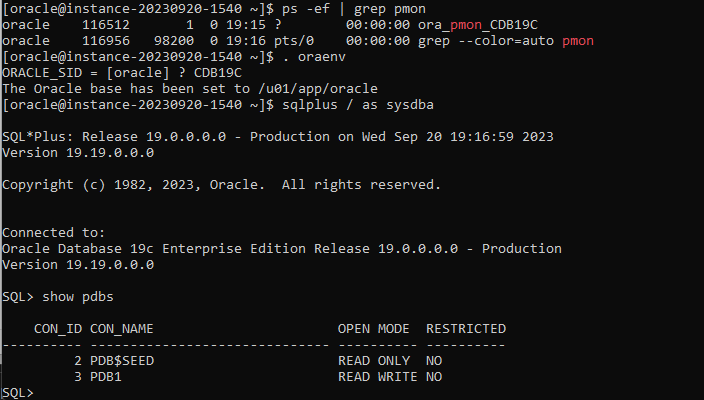
Creation of the database completed successfully! And as you can see below, it is running as a CDB with one PDB:
It is pretty straightforward, and if you have already done some installation on Oracle Linux or Red Hat, the steps are basically the same.
On the other hand, keep in mind that this is a “full” version. Hopefully, Oracle will release a 23c version compatible with ARM soon so that everyone can play for free indeed!
If you have any trouble with the installation, don’t hesitate to comment on the post. Also, if you have done any kind of performance comparison between x86 and ARM, let me know your thoughts!


Leave a comment